I am not a baker per se. I don’t have the fancy scales, cake pans and pie tins that are hallmarks of a serious baker. I dabble in baking and usually it turns out pretty tasty … although I have never quite figured out how to make my flourless cake not crumble the instant I try to serve it on a plate. Regardless, I’d like to think that I’m a decent baker because I am a rule follower. To the T. So I can follow a recipe like it’s nobody’s business. When we finalized our plans for this trip, I decided that I wanted to learn how to make bread so that I can make some bread for us from time to time on the road.

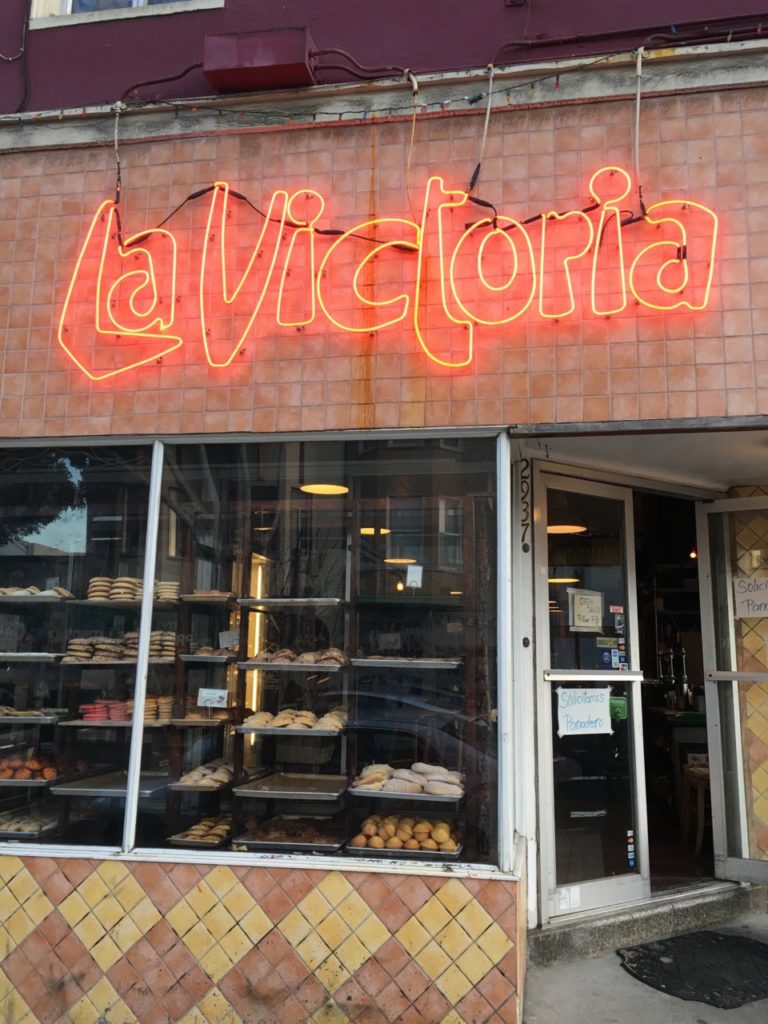
My friend Julia and I took a sourdough bread class in San Francisco at a famous old bakery in the Mission called La Victoria through a company called Sour Flour.
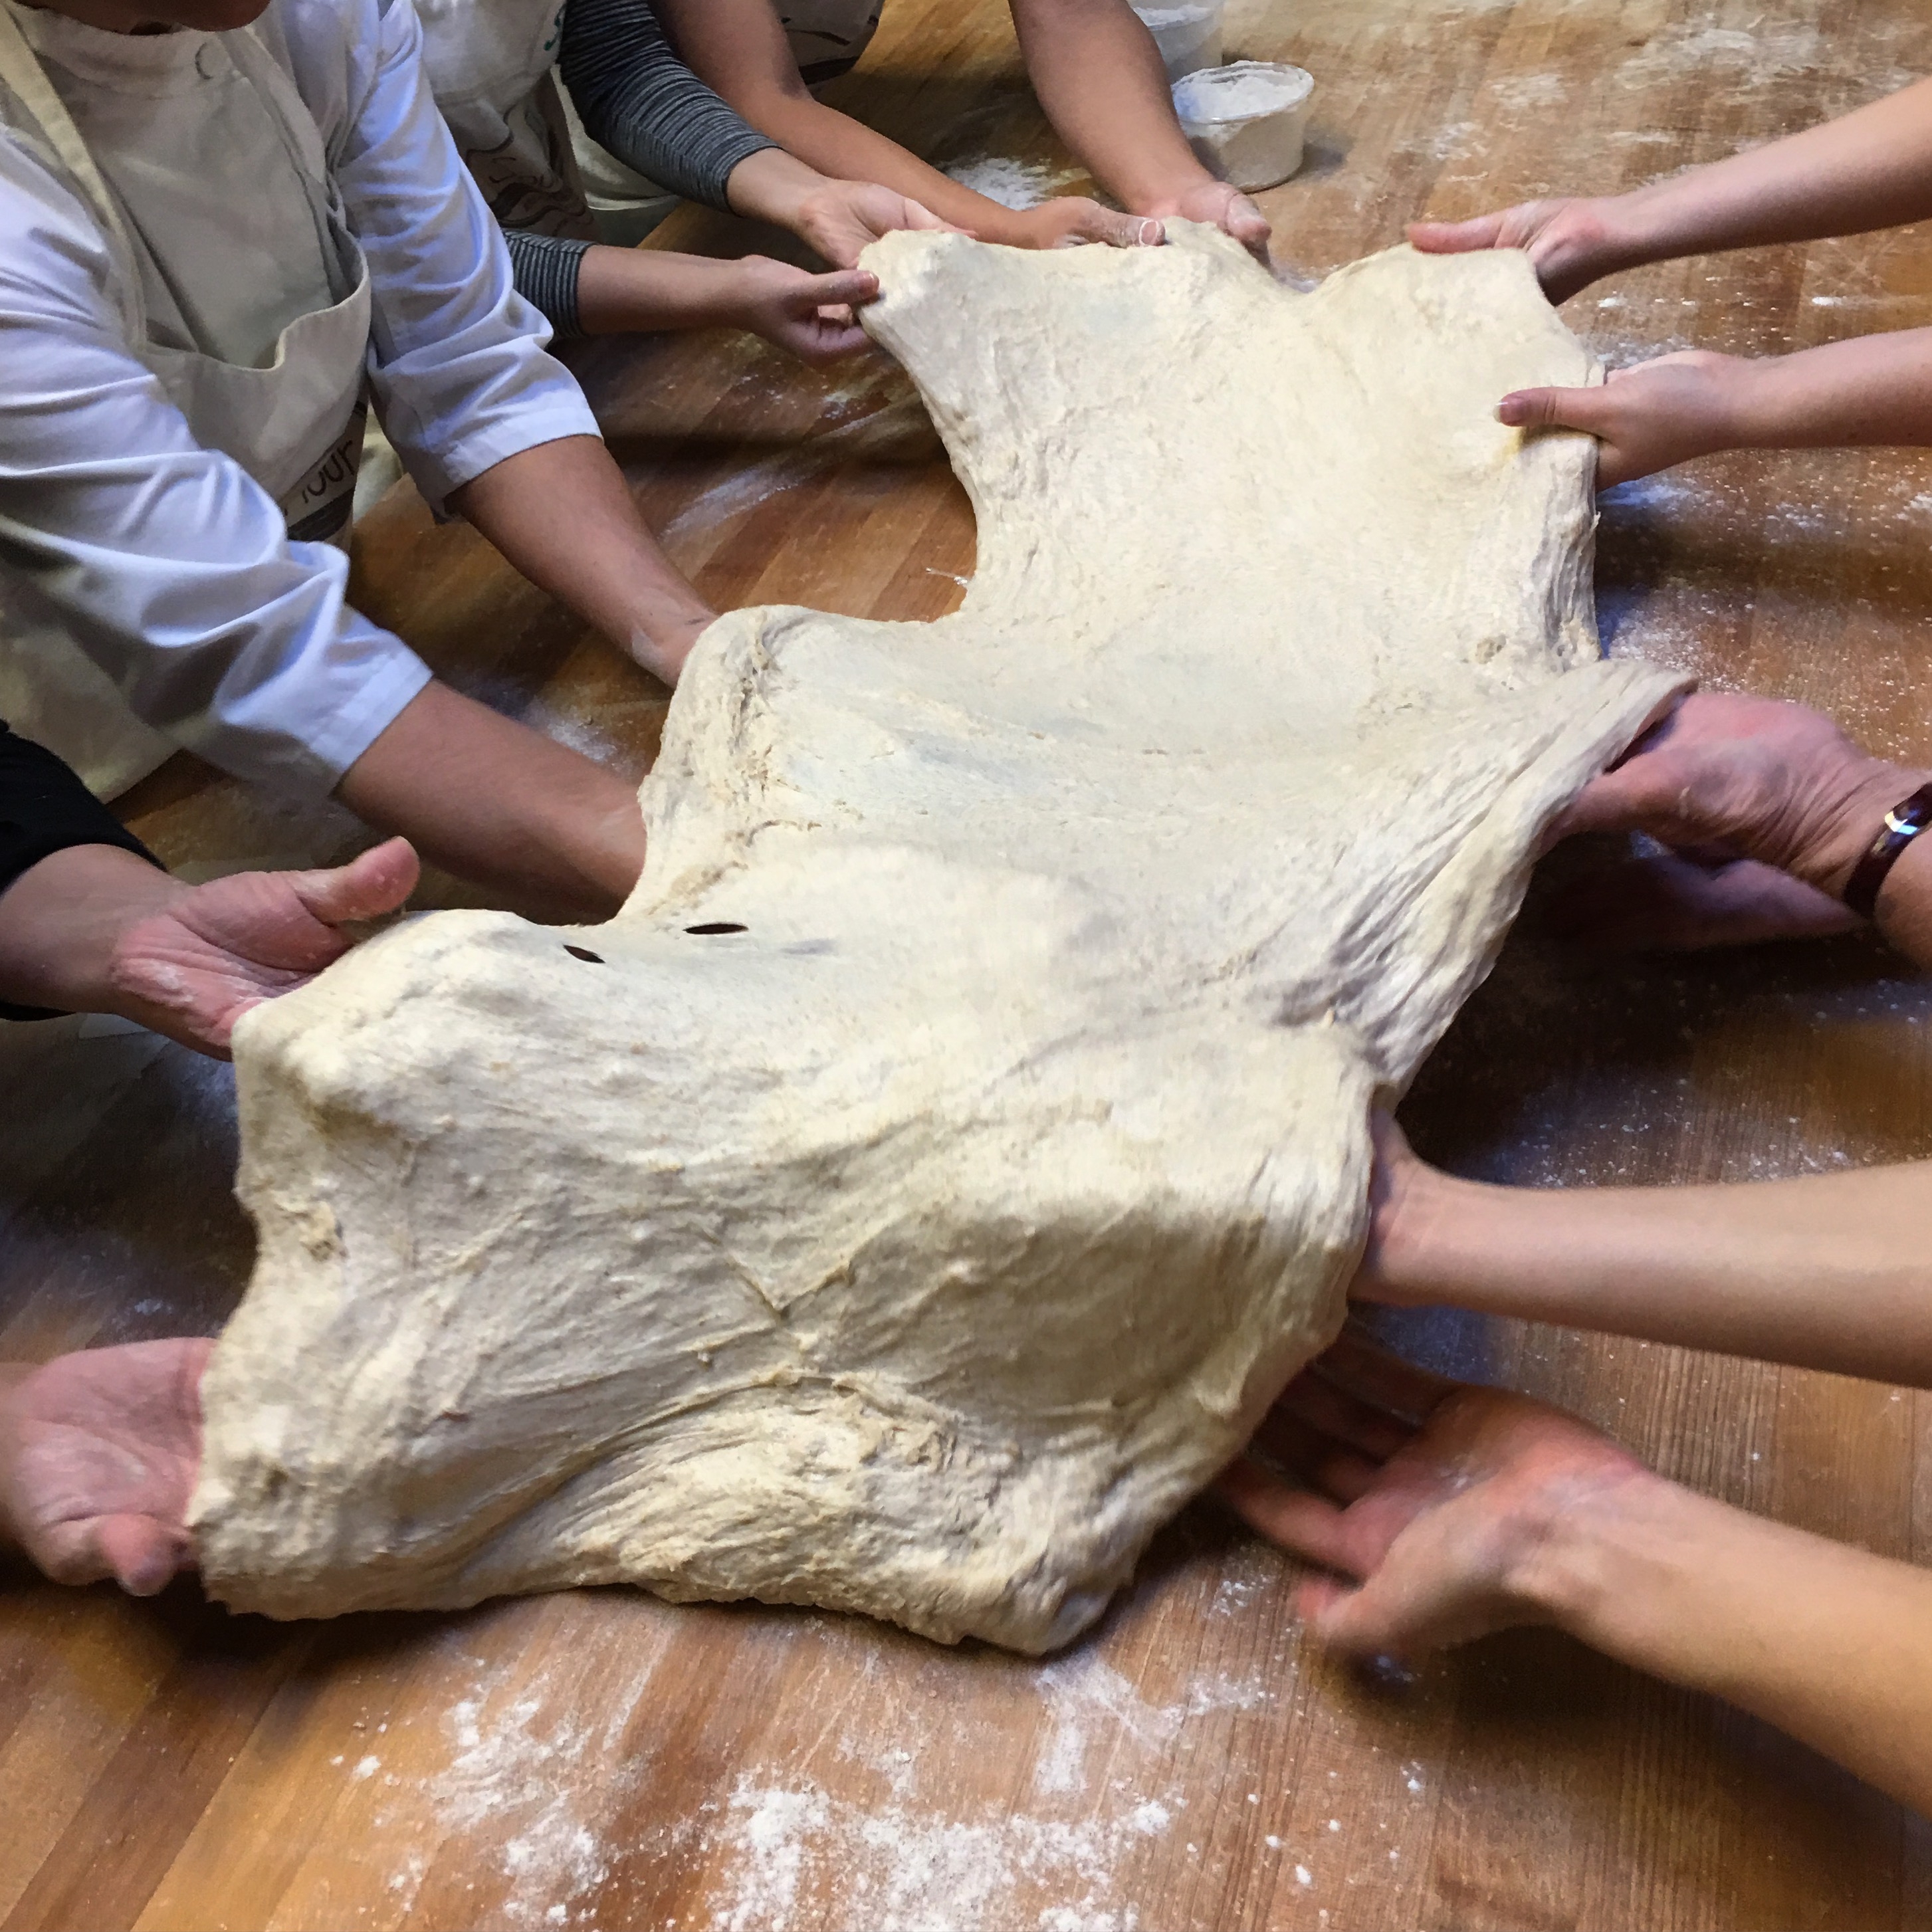

It was a fabulous class, we learned the basics of sourdough bread, learned about the starter and learned how to mix, knead and cut the dough in order to make the bread. But then we only learned how to make sourdough flatbread, not entire loaves of bread.
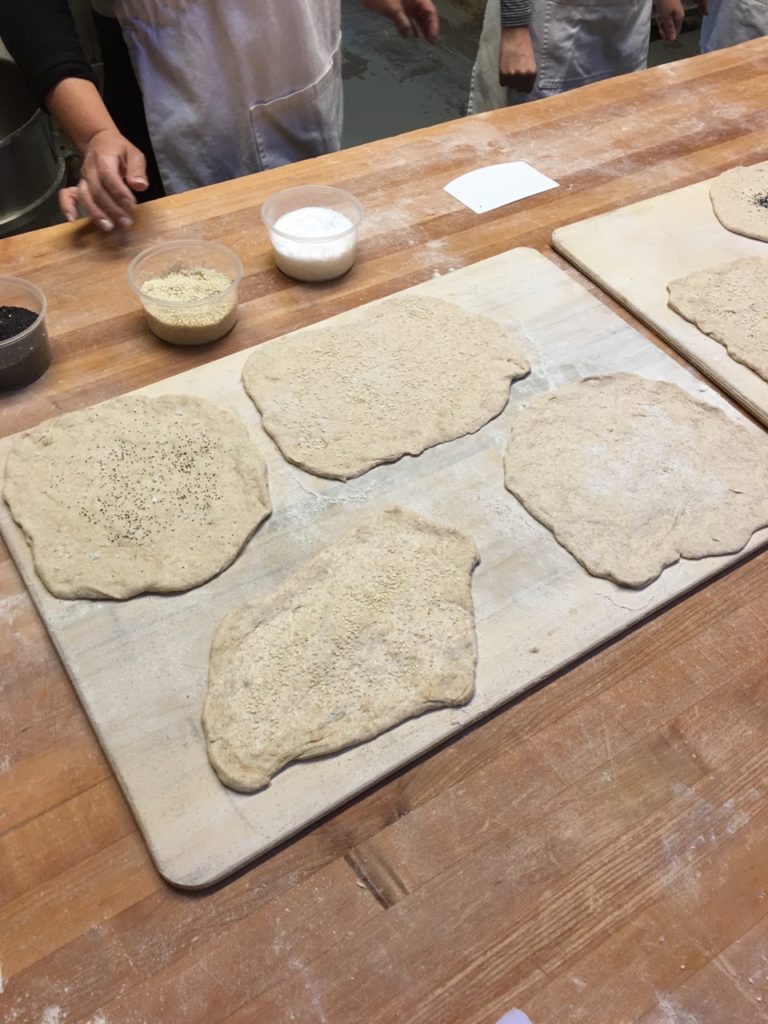
And the recipe that they gave us as a handout to take home didn’t contain a full recipe for a sourdough loaf either. So I decided that I’d just do some googling and try to figure it out. The good thing about sourdough starter is that you can keep feeding it and growing it and so if you mess up a recipe, you’ve got a seemingly limitless supply of the sourdough starter to work with. A HUGE thank you to Julia who so kindly gave me some of her starter when I accidentally threw mine away when we were cleaning out the apartment to head on this road trip!
Much to my AMAZEMENT, I actually have been able to make sourdough bread in a Lodge castiron dutch over over a bed of charcoals. I found a couple of recipes online and on pinterest and had to cobble them together to figure out how to make sourdough bread using a starter, over an outdoor bed of charcoals. I had a recipe for how to do this without a starter over coals, and I had a normal recipe for how to bake a loaf using starter, but in a regular oven. And so I said hey – what the heck, let’s give this a go. Click here and here for a couple of the recipes that I loosely referenced.

Sourdough Starter
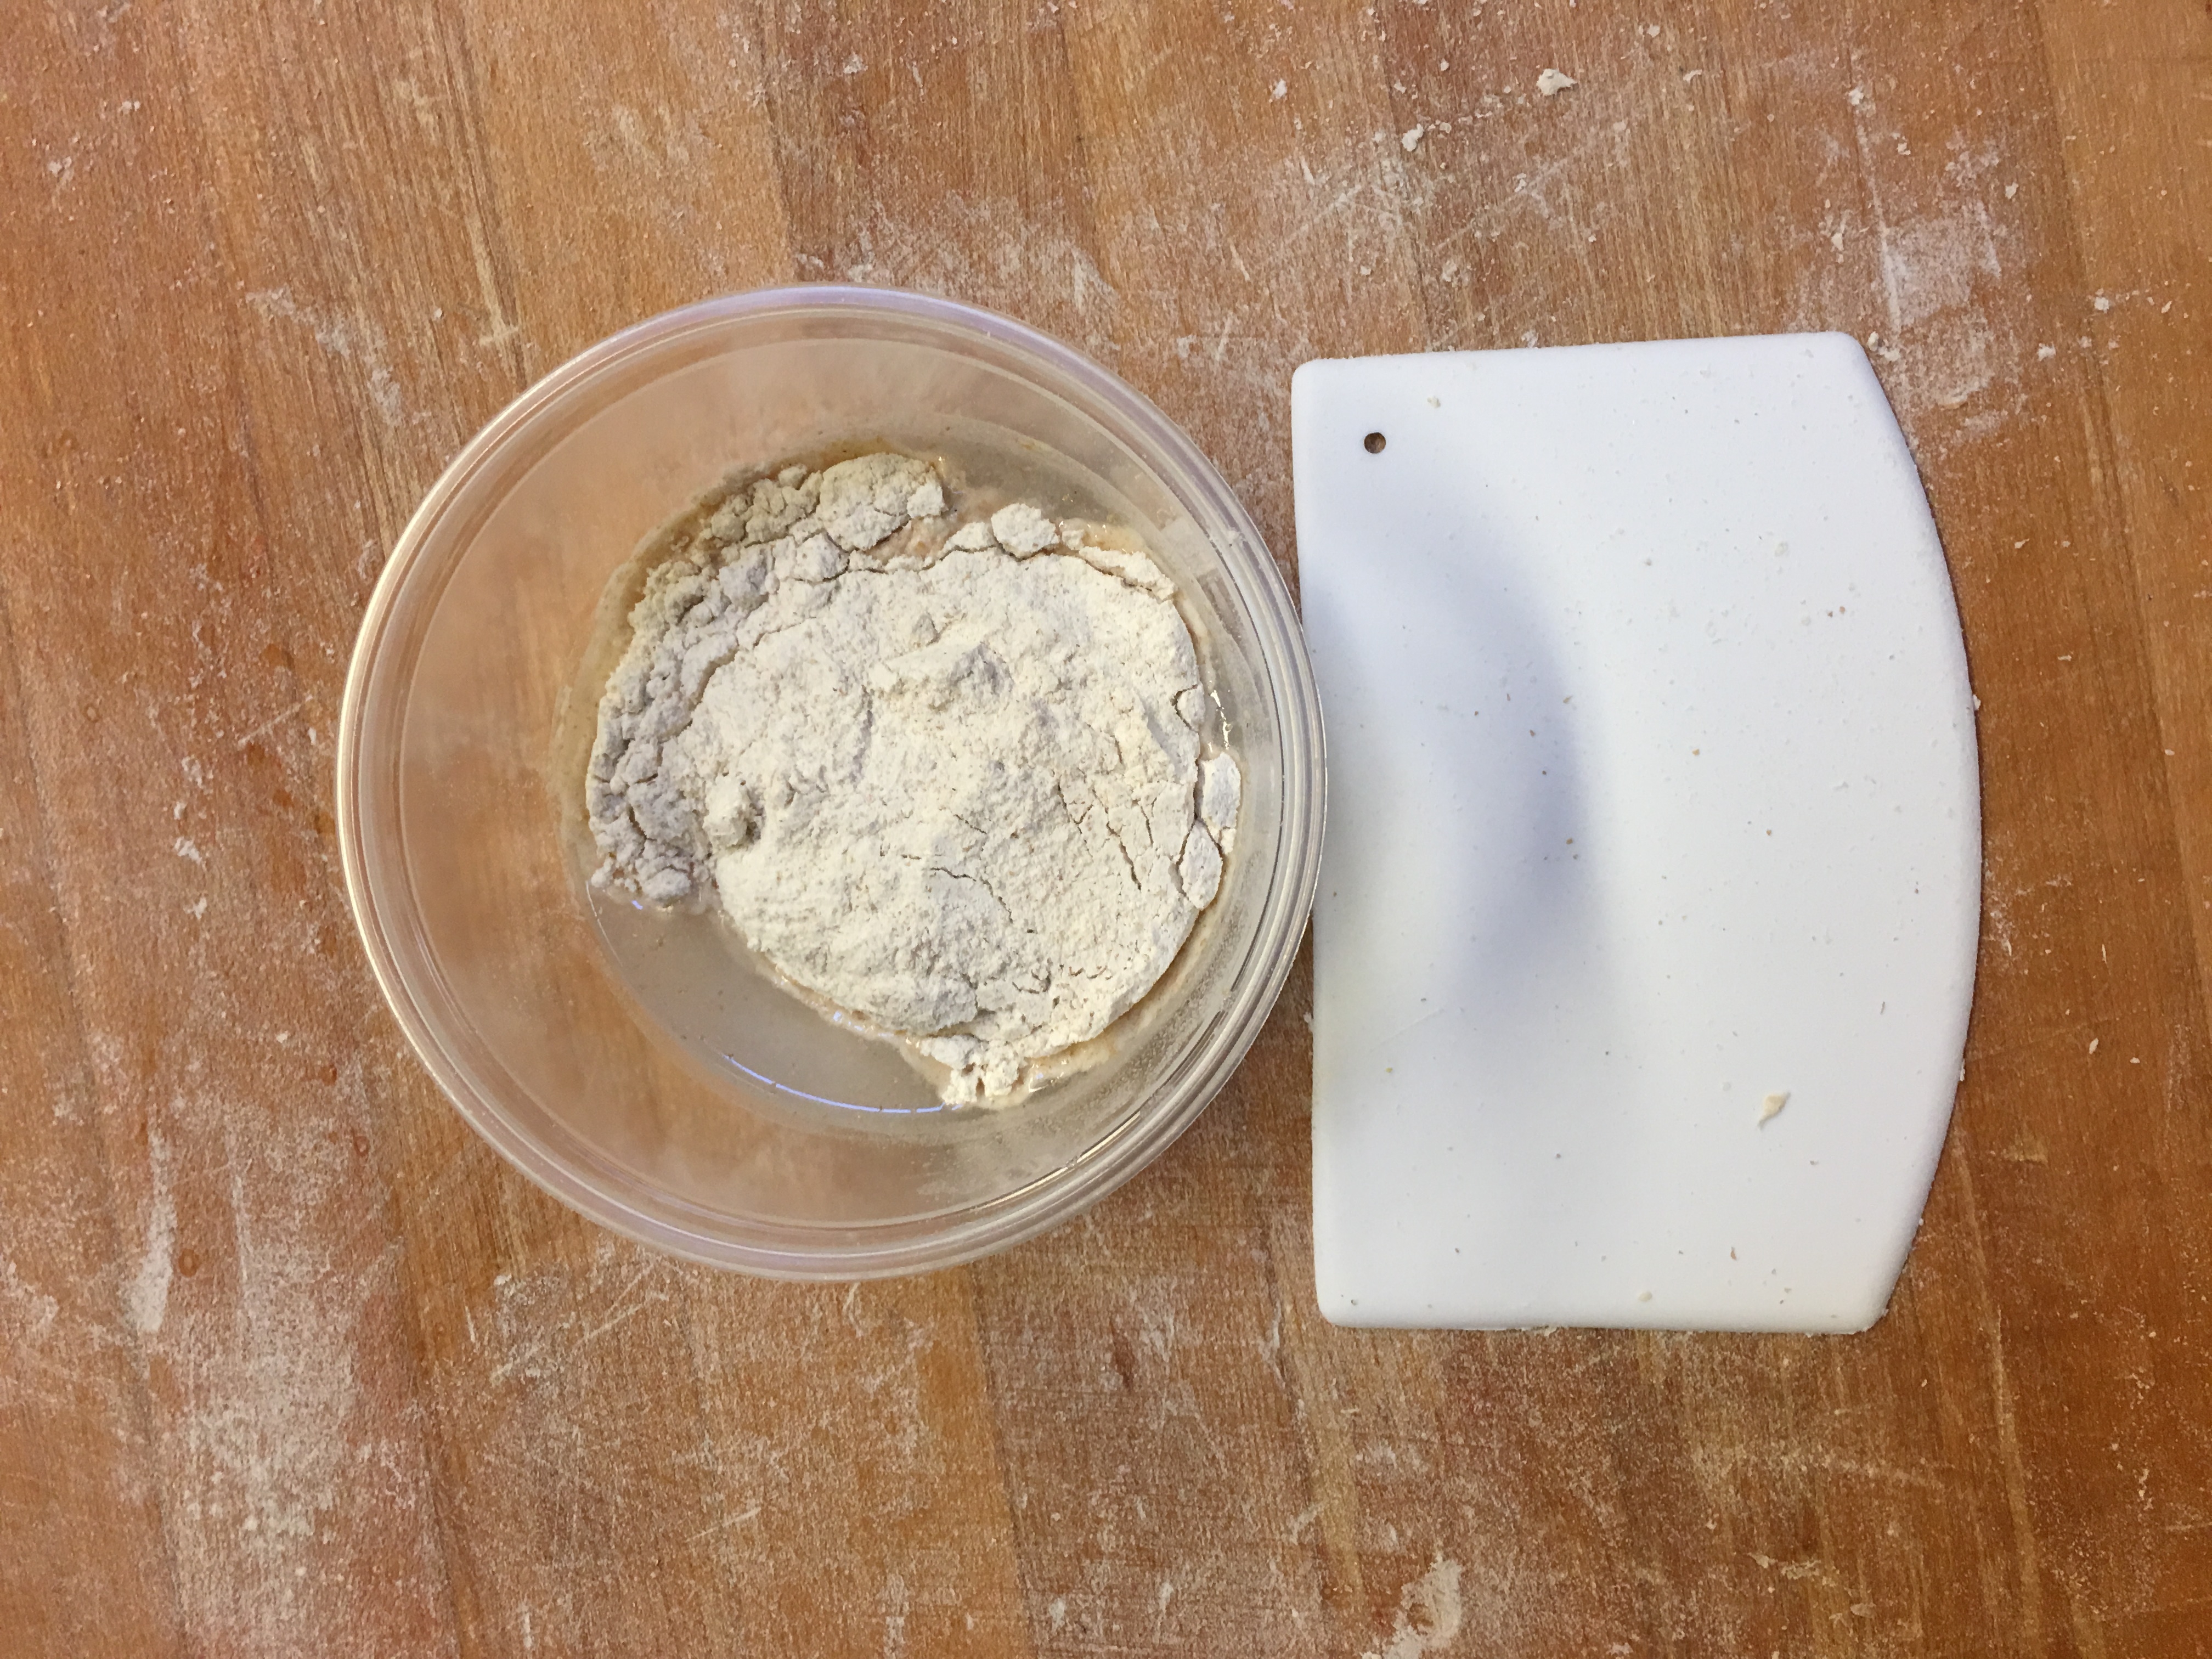
First I had to feed my starter to get it going and active since it had been in the cooler chilling for about a month since we took off on our trip. And I seriously wondered if you can inadvertently poison yourself with sourdough starter gone bad?! But hey, let’s go with it and hope for the best! So I warmed it up to room temperature, and added flour and water to the starter to get it feeding and bubbling. The problem here is that most starter feeding recipes (including the one that I had from my cooking class) list the ingredients in grams. This is NOT HELPFUL. I do not have the space in our tiny teardrop camper to bring along a scale and the proper measurement cups to measure ingredients in grams. And in general most people work with tablespoons, teaspoons and cups (see above – not a professional baker). So I had to do a bit of googling to figure out how many grams were equal to how many cups or tablespoons of starter, flour and water – and don’t be fooled, they are not the same for each. So 50 grams of starter is roughly equal to 5 tablespoons of starter, 50 grams of flour is roughly equal to 1/3 of a cup of flour and 50 grams of water is roughly equal to 1/4 of a cup of water. Wouldn’t it be nice if they were all the same, but they aren’t! So the recipe that I had from my sourdough class said to feed your starter in a 1:5:5 ratio, so if you have 10 grams of starter (i.e. 1 tablespoon), add to it 50 grams of water (i.e. 1/4 of a cup) and add in 50 grams of flour (i.e. 1/3 of a cup). Repeat this morning and evening a few times so that the starter will be active – each time you feed your starter, you can throw away part of it so that you don’t end up with a huge amount of starter (trust me, that happened – we didn’t have a container big enough for the starter, and I didn’t even need that much!!). After feeding my starter once in the morning, again at night and then again the next morning, making sure it was bubbling and active (it’s supposed to double in volume if it’s really going, but mine never fully doubled – it did grow though and bubbled and smelled nice and yeasty-fruity). Then I took 1 cup of the starter (again, the recipe called for 150 grams – some googling said 16 tablespoons is roughly one cup so that’s what I went with) and mixed it with 2 cups of flour, 1 cup of water and 2 tablespoons of olive oil. The recipes call for bread flour – explicitly stating not to use all purpose flour. Oh well, I use what I have and what I had was all purpose flour so that’s what I used. I mixed these together with my hands until the formed a sticky dough ball.

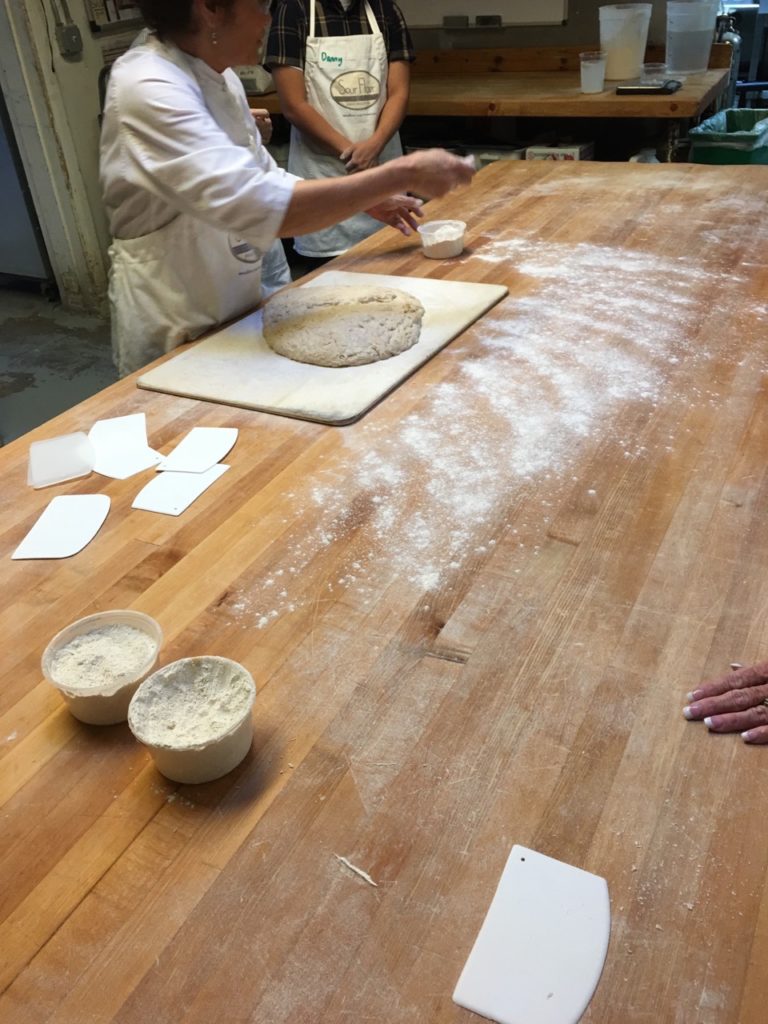
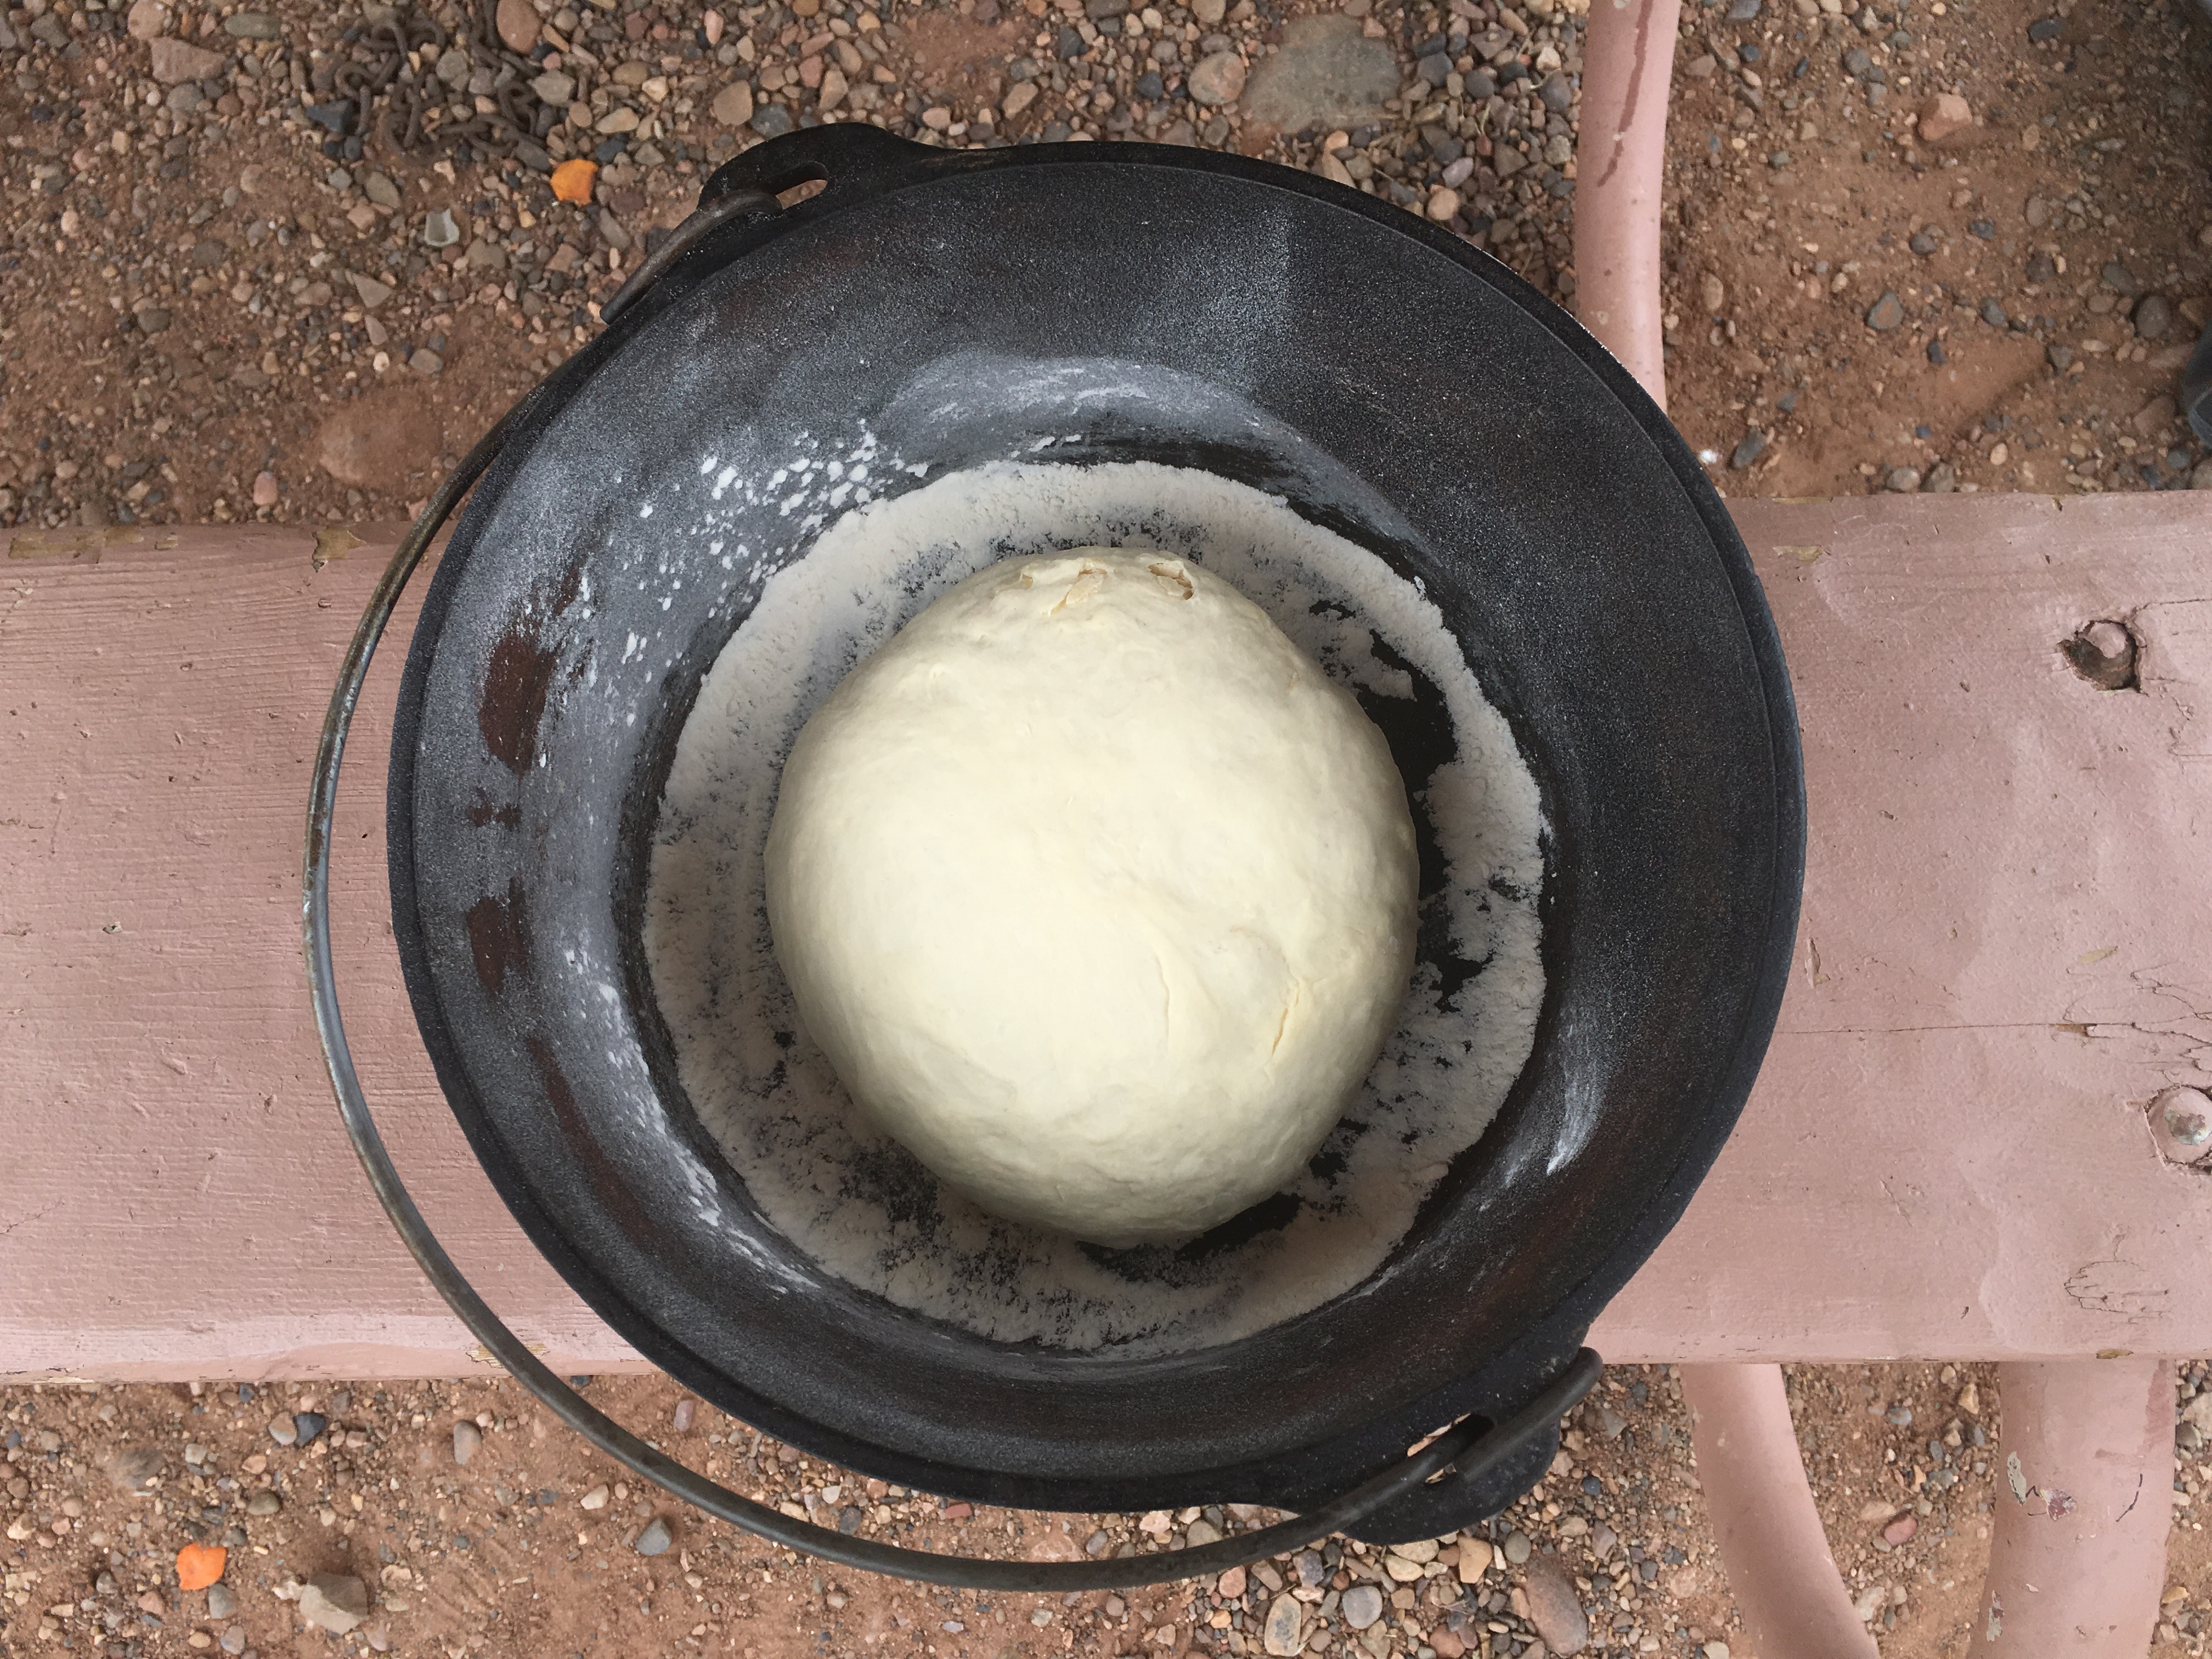
I left the dough ball in the bowl for 30 minutes so that it could autolyse, which the recipe called for. This allows the flour to hydrate and the gluten to begin to develop. Then I sprinkled 2 teaspoons of salt on the dough ball, kneaded it a few times, and left it in the bowl covered by a damp towel in the back of the camper while we went out for a hike. I was supposed to leave it to rise for about 2 hours, but we were gone for more like 4 hours. The dough rose quite nicely and so I took it out of the bowl, placed it onto a well floured cutting board, squished it out and kneaded it together several times so that it formed a nice round dough ball. I folded each of the sides under it and kept tucking the sides towards the middle of the bottom of the dough ball, until it formed a pretty decent looking round mound of dough. I then put this into the dutch oven which I’d floured nicely, including flouring the sides of the oven. I put the top on it and allowed it to rise in the dutch oven. I left it to rise overnight, though the recipe had called for only a few hours. We were in a particularly chilly area, so the dough was not going to rise as quickly as it would if you were in your sunny, warm kitchen. When we woke up, the dough had risen and grown in size and so I decided it was tim to put this baking to the test! I used a serrated knife to cut a 1-2 inch slit in the top of the dough ball. This is supposed to let some air out through the top of the bread as it’s baking.
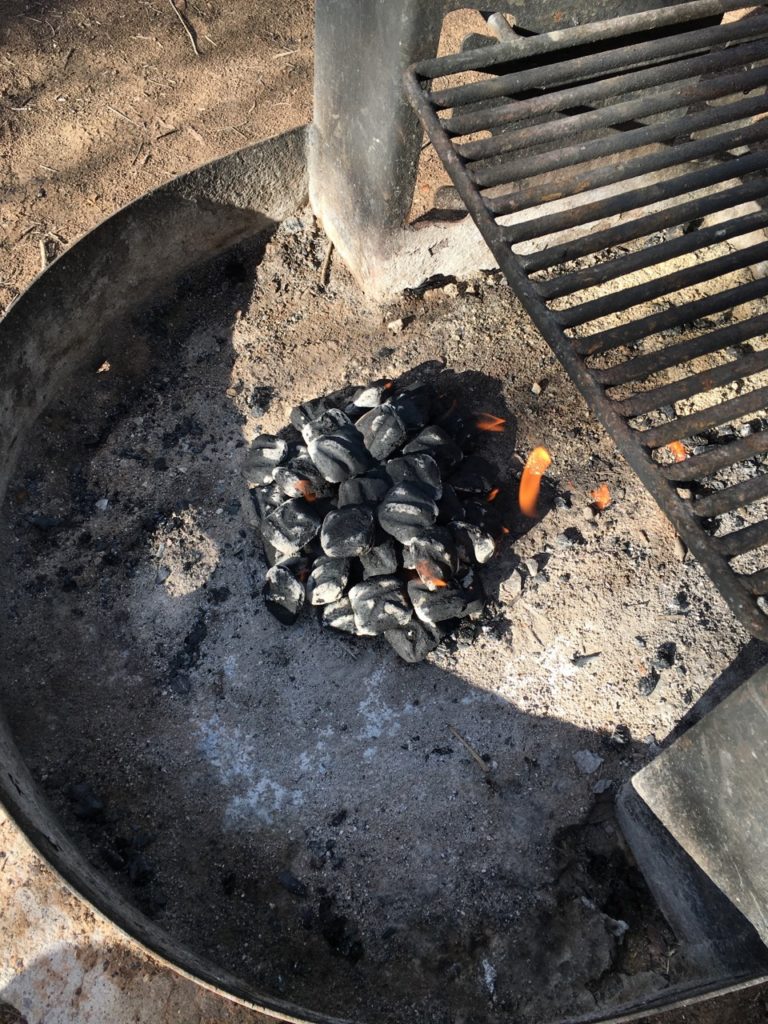
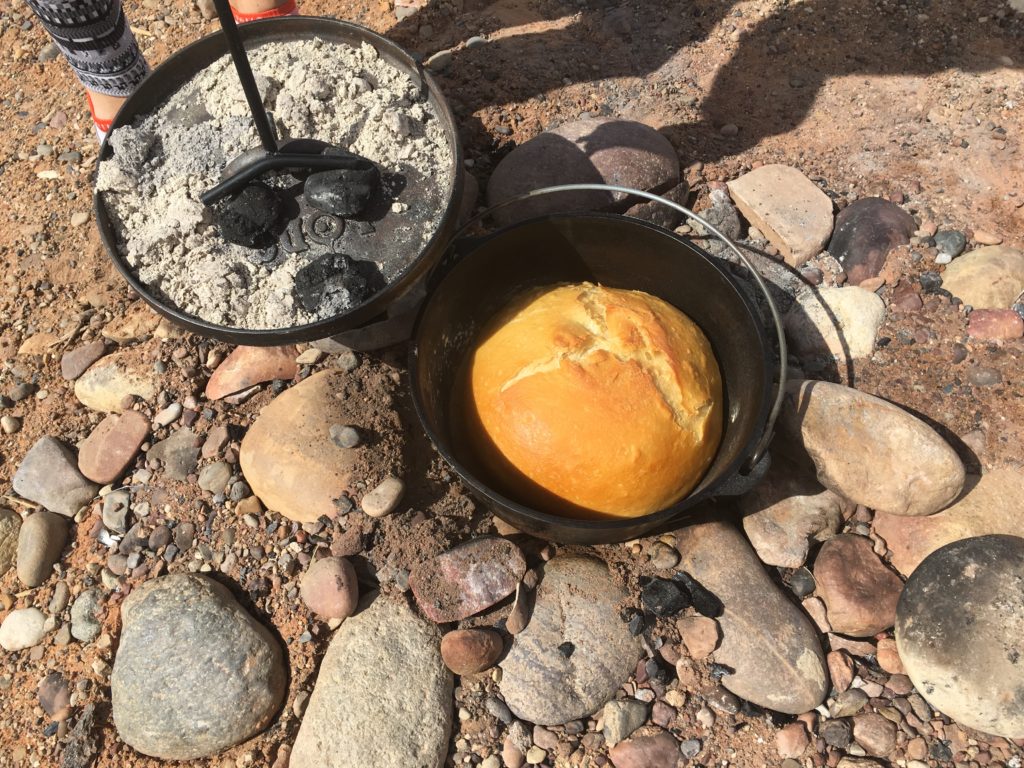
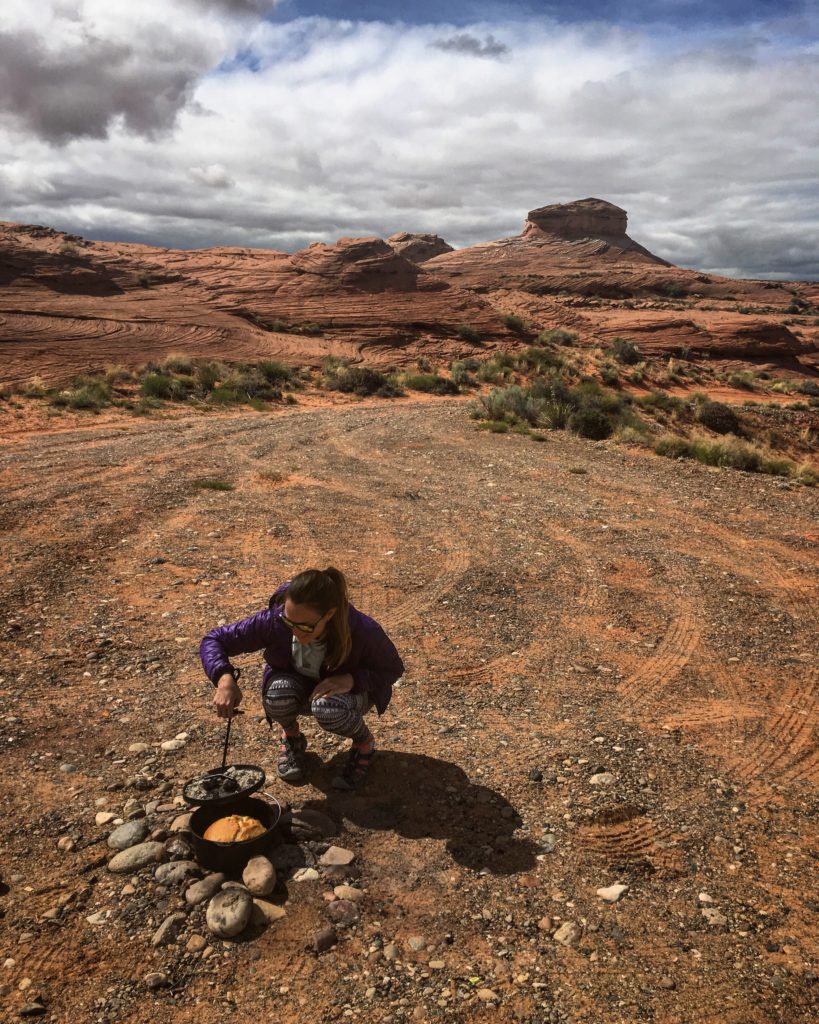
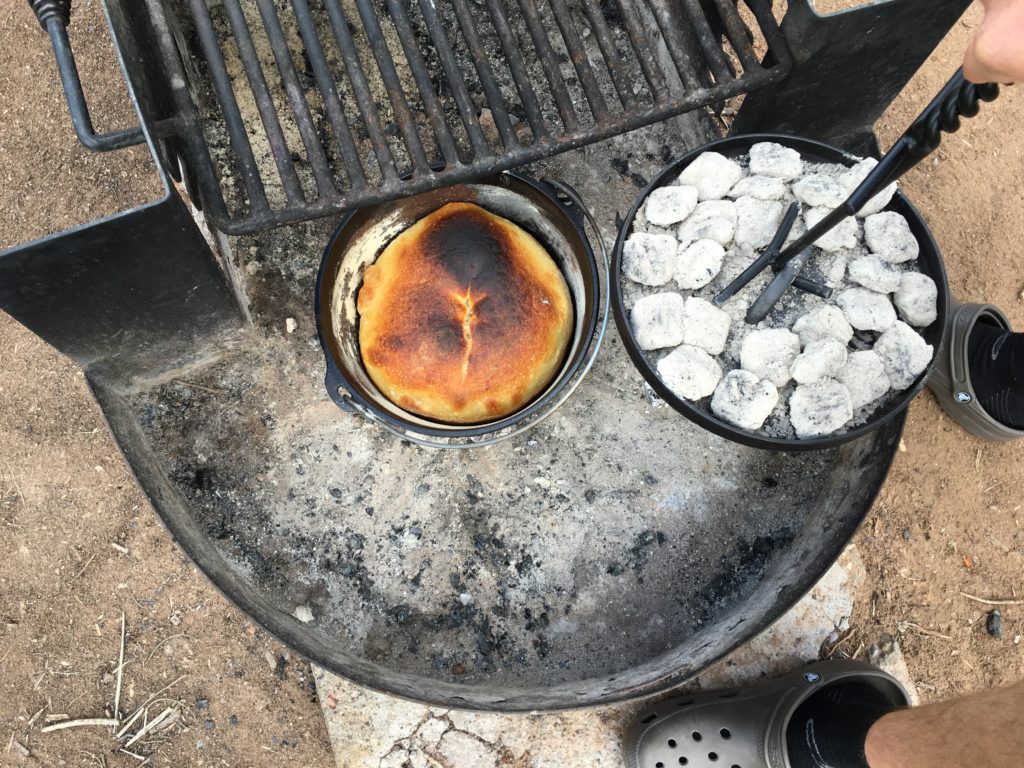
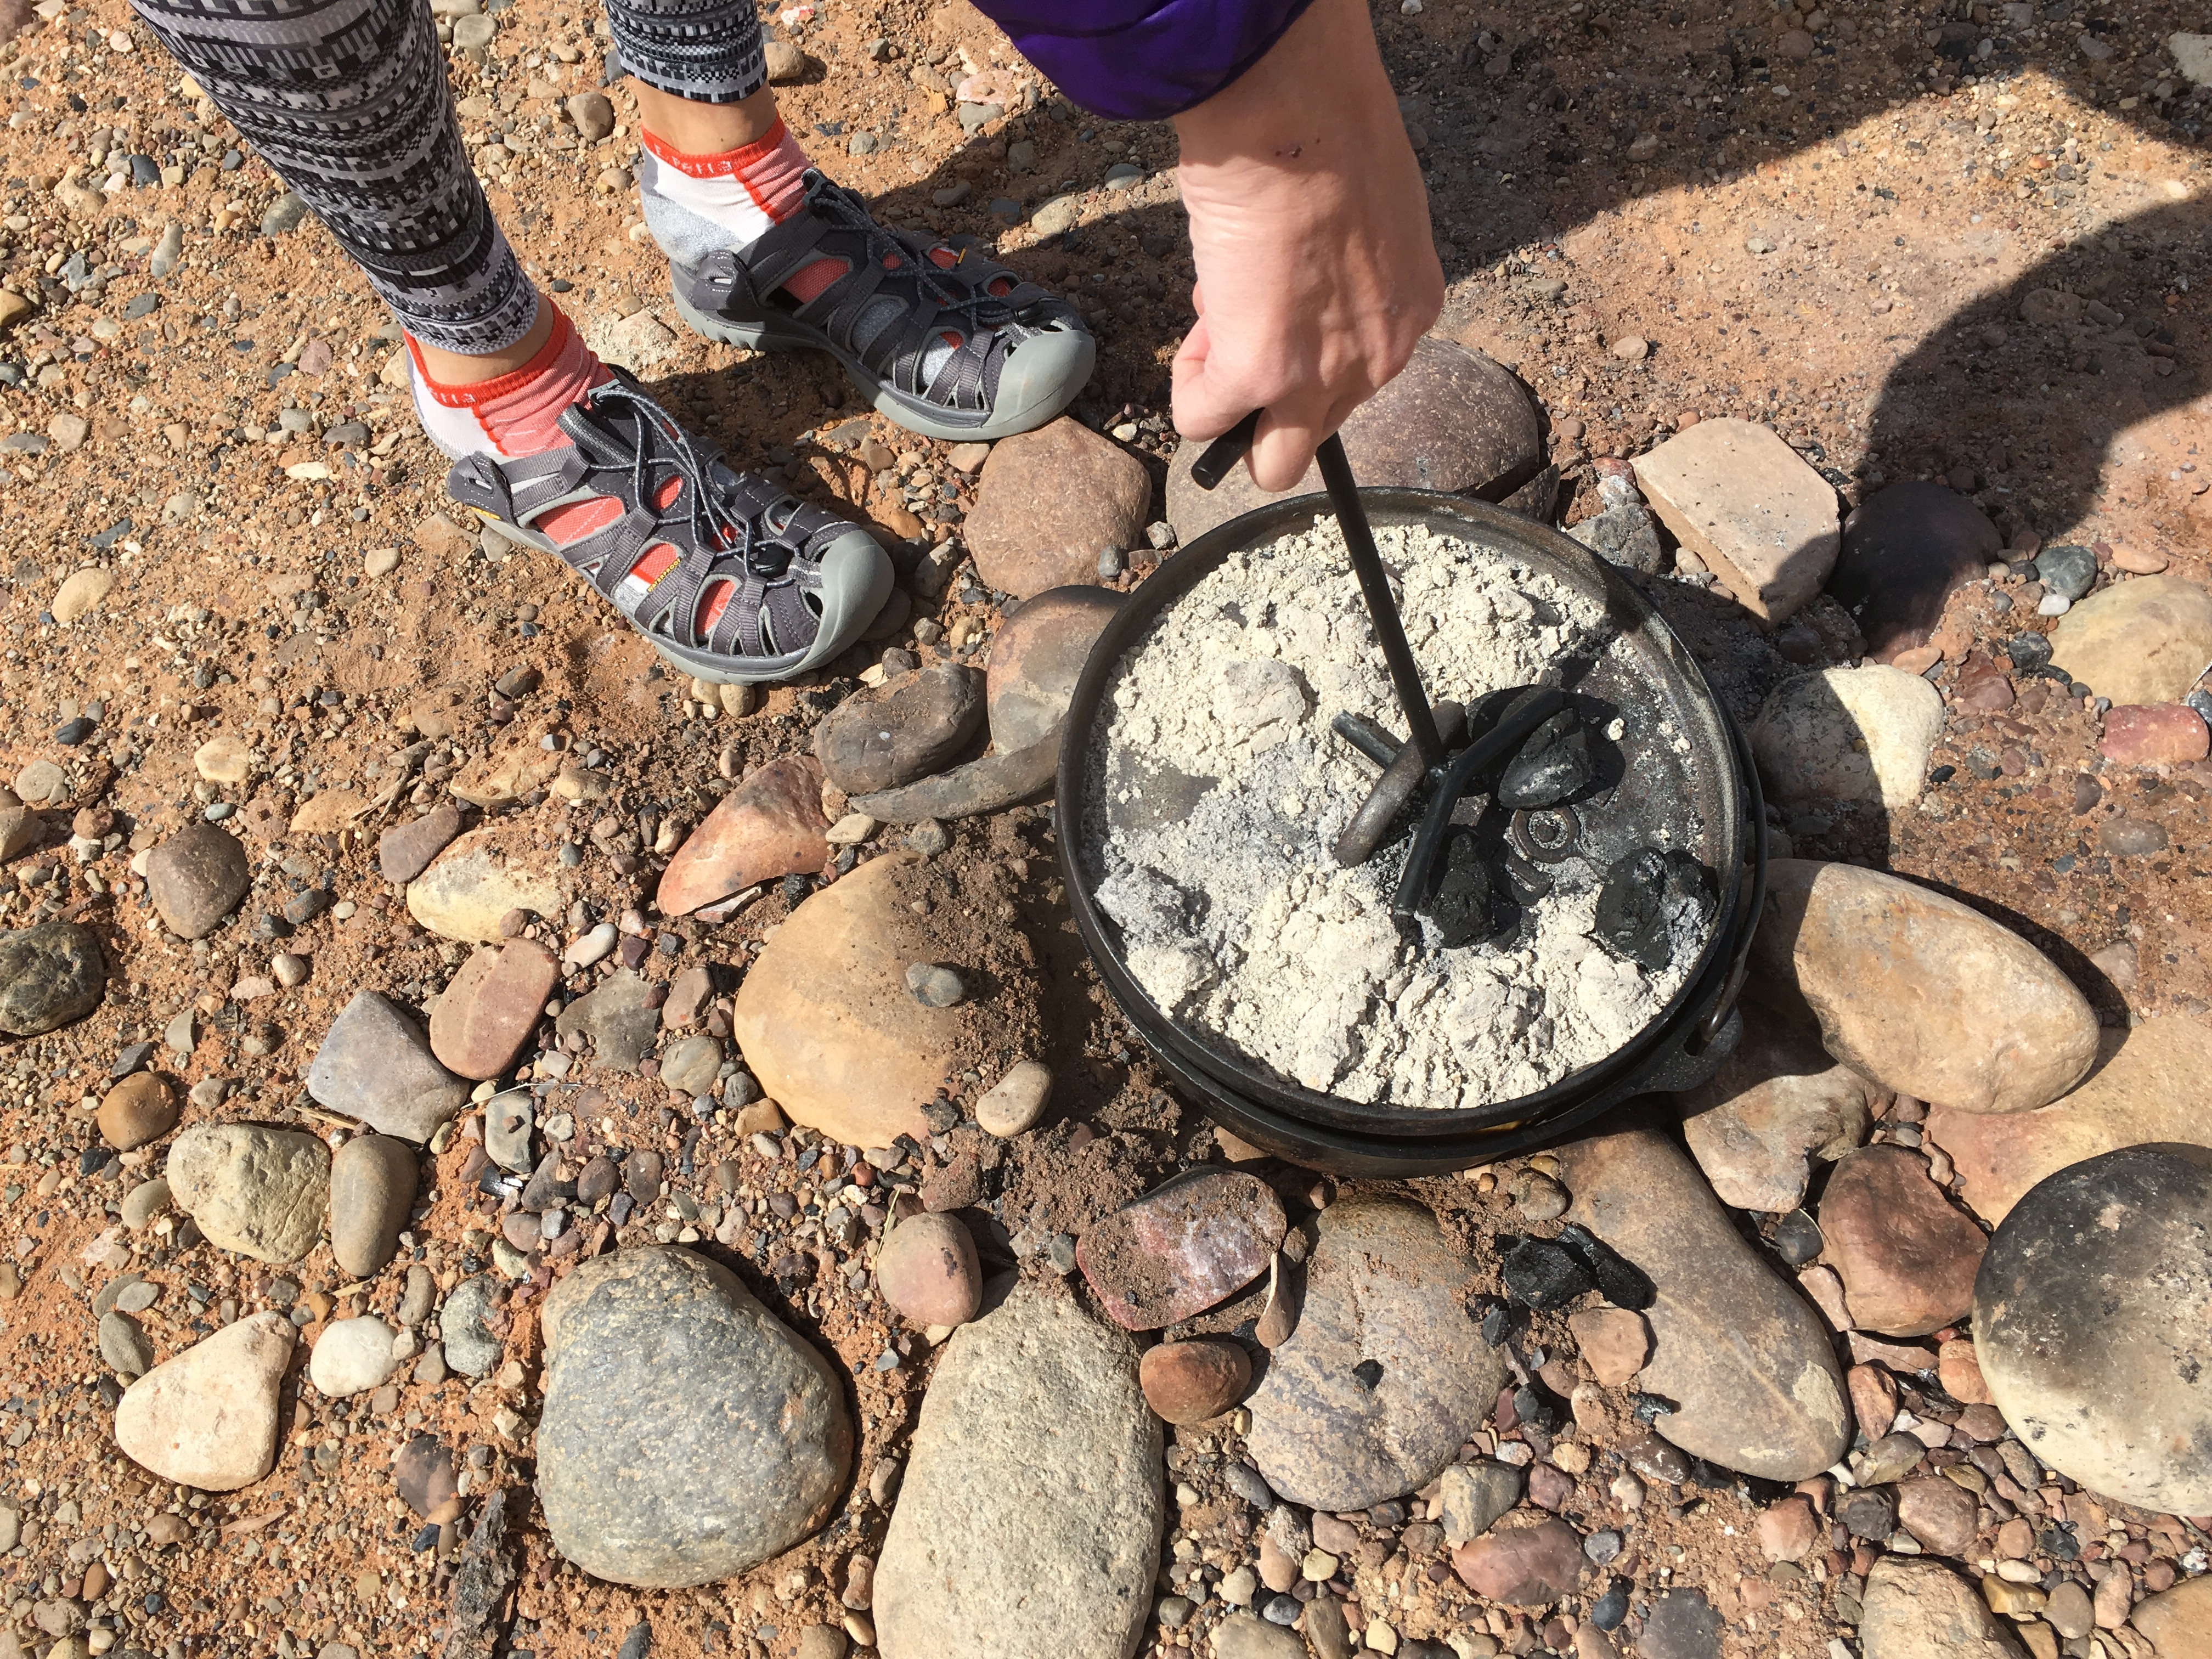
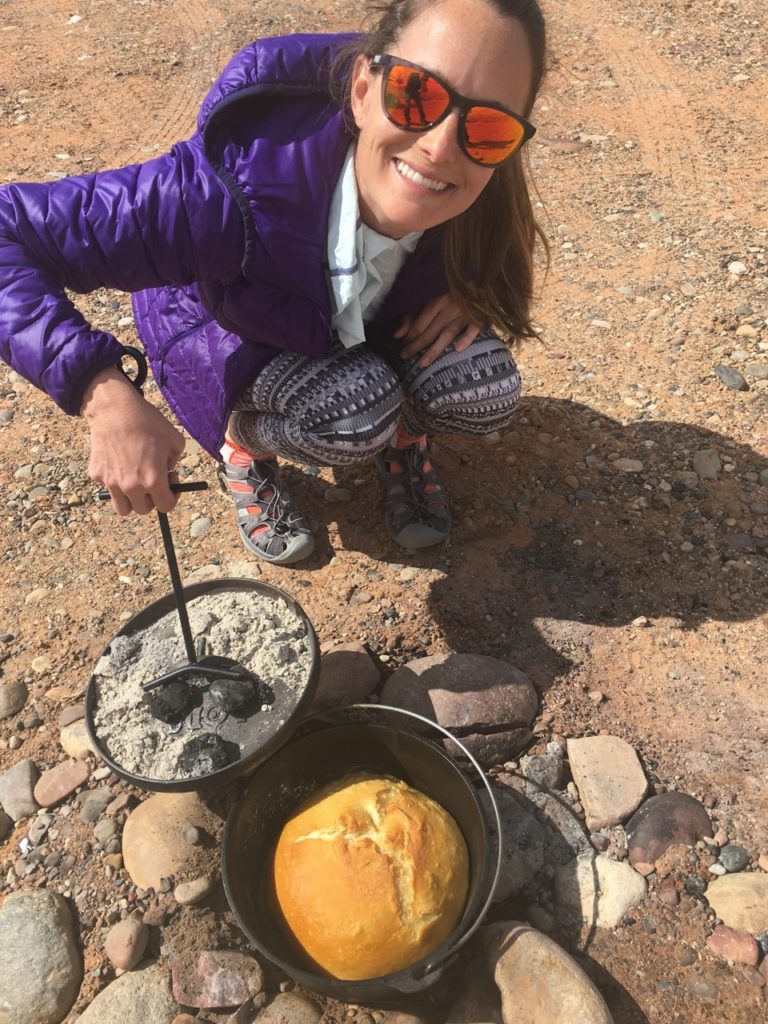
This recipe on Pinterest was helpful to me to figure out how many charcoals to use and how to situate them – I didn’t realize that most of the charcoals should actually be placed on top of the dutch oven to keep from burning the bottom of the bread. I used about 33 charcoals (each coal carries about 10 degrees of heat, so if you want to bake at around 300-350 degrees, 33 is about right). I used the self burning charcoals, so I piled them all together, lit them on fire and let them burn with fire and then smoke until they started to turn grey and stopped smoking.
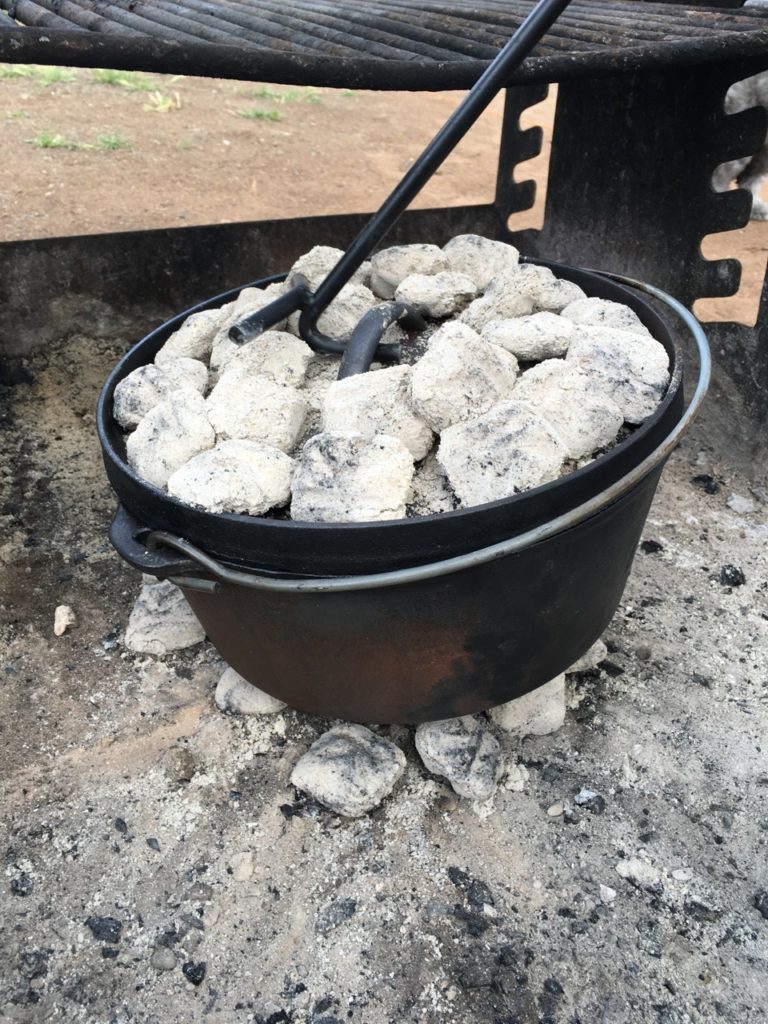
Then I took about 23 of the coals to the side, placed the dutch oven on top of the remaining coals, then piled the 23 separate coals onto the top of the dutch oven and let it go.
The recipes I’d found said I should cook it about an hour, and rotate it about halfway through that.
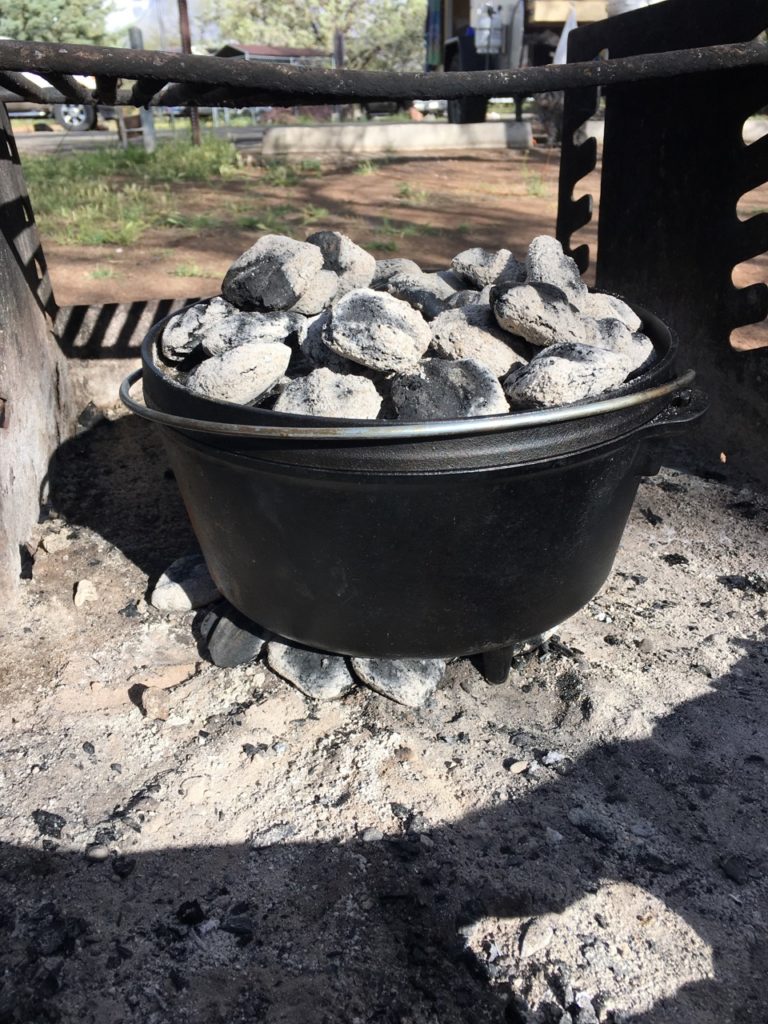
So I left it to cook for about 30 minutes, rotated it halfway while checking it (I know, I know – the dreaded lifting of the lid, equivalent to opening the oven door – but I had to know it was working correctly! Plus I always open the oven door to check things out – hate me if you must, professional bakers).
I then let it bake some more, and checked on it after 15 more minutes, and LO AND BEHOLD it was done! I had baked an actual loaf of bread!
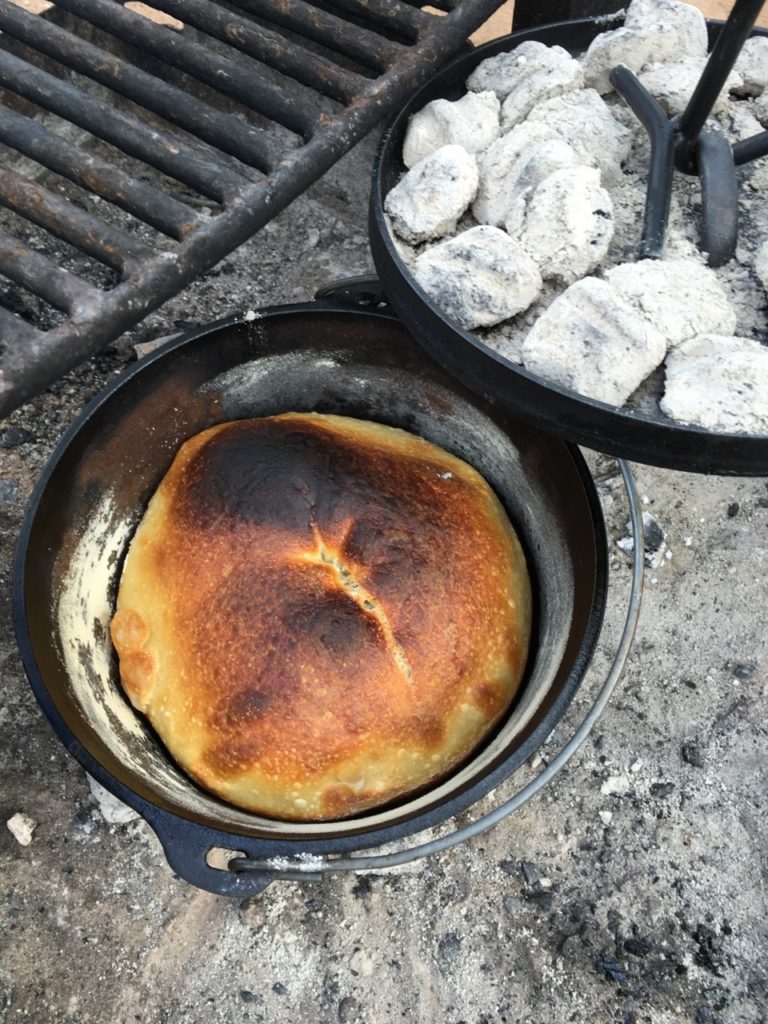
Well something that looked like a pretty legit loaf of bread anyways – a little imperfect because my kneading skills could use some work so there was a pretty big air bubble on top and that bubble had gotten a bit blackened from being so close to the lid. But a loaf nonetheless. We were AMAZED.
My husband simply did not imagine in his wildest dreams that he had married a bread baker. Gotta keep surprising them after so many years, no?

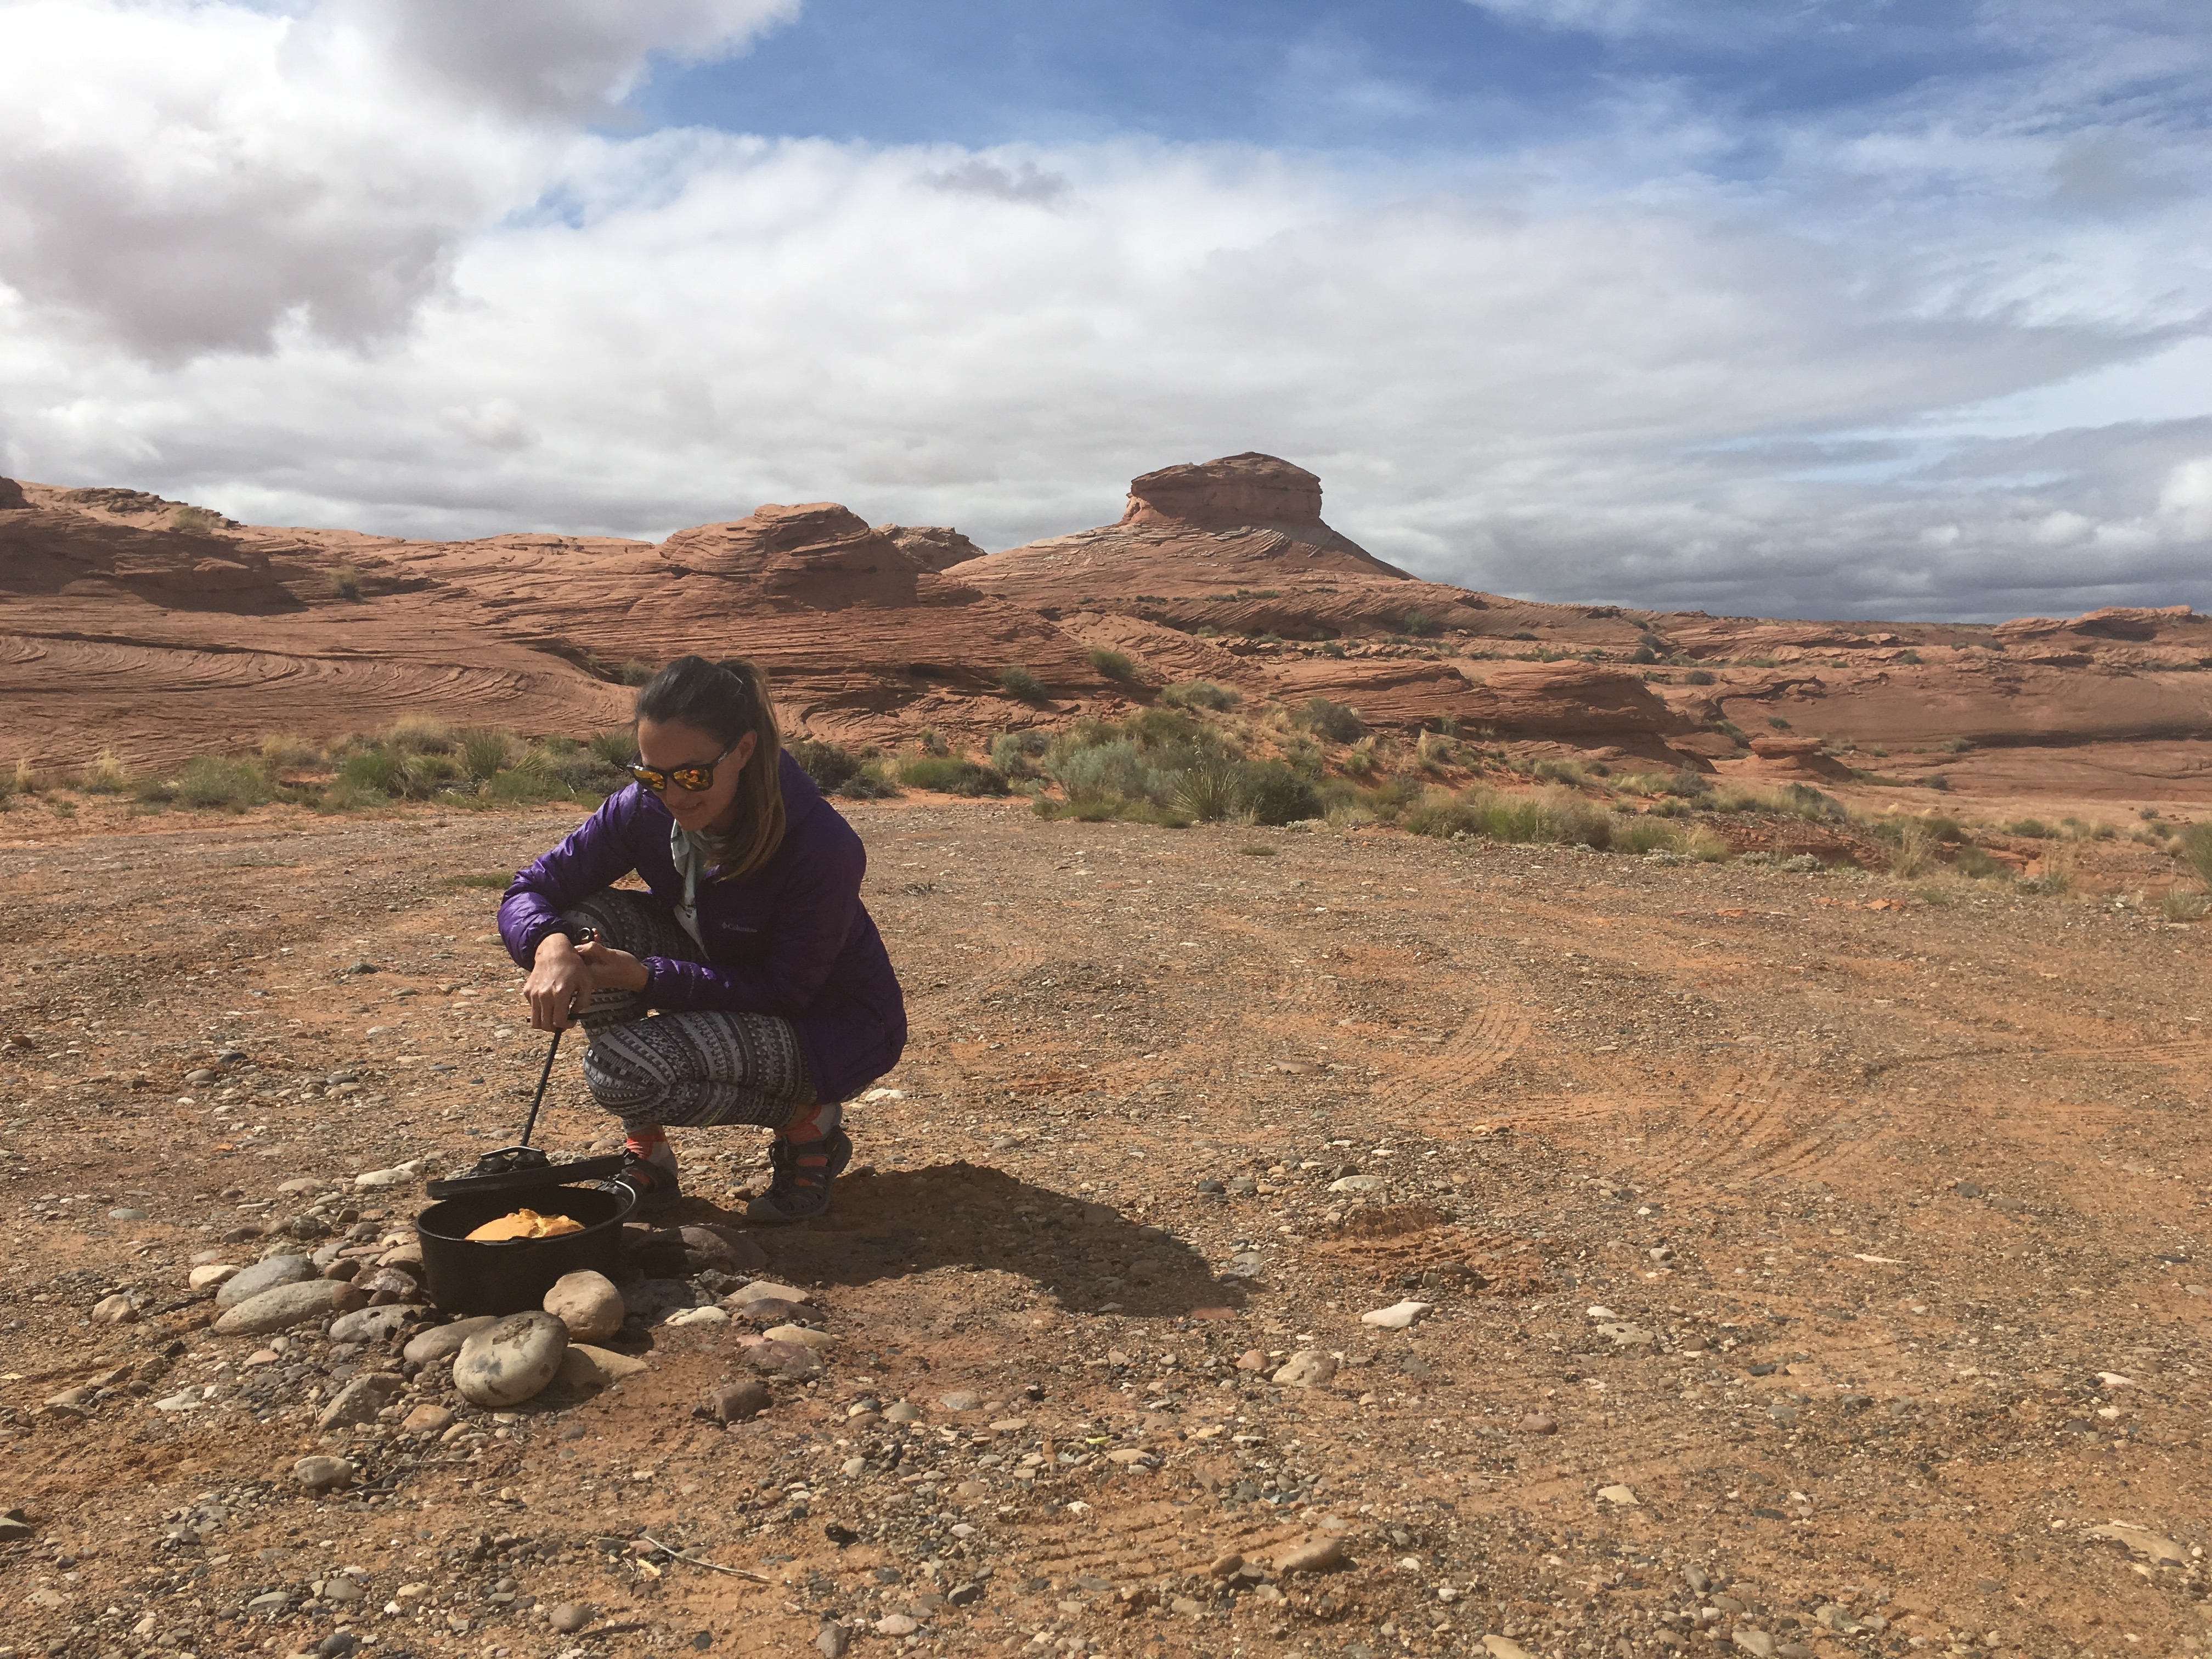
So we took the dutch over off the coals, took LOTS of pictures to document this, the first ever Swig Sourdough loaf, and let it cool for a little while.
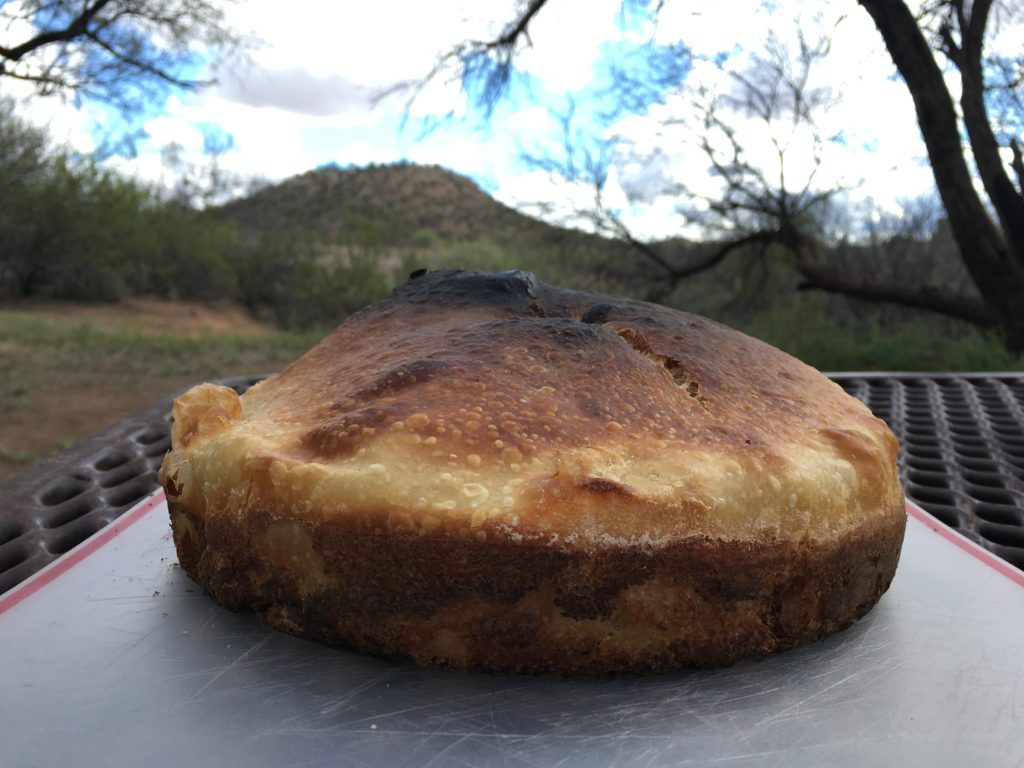
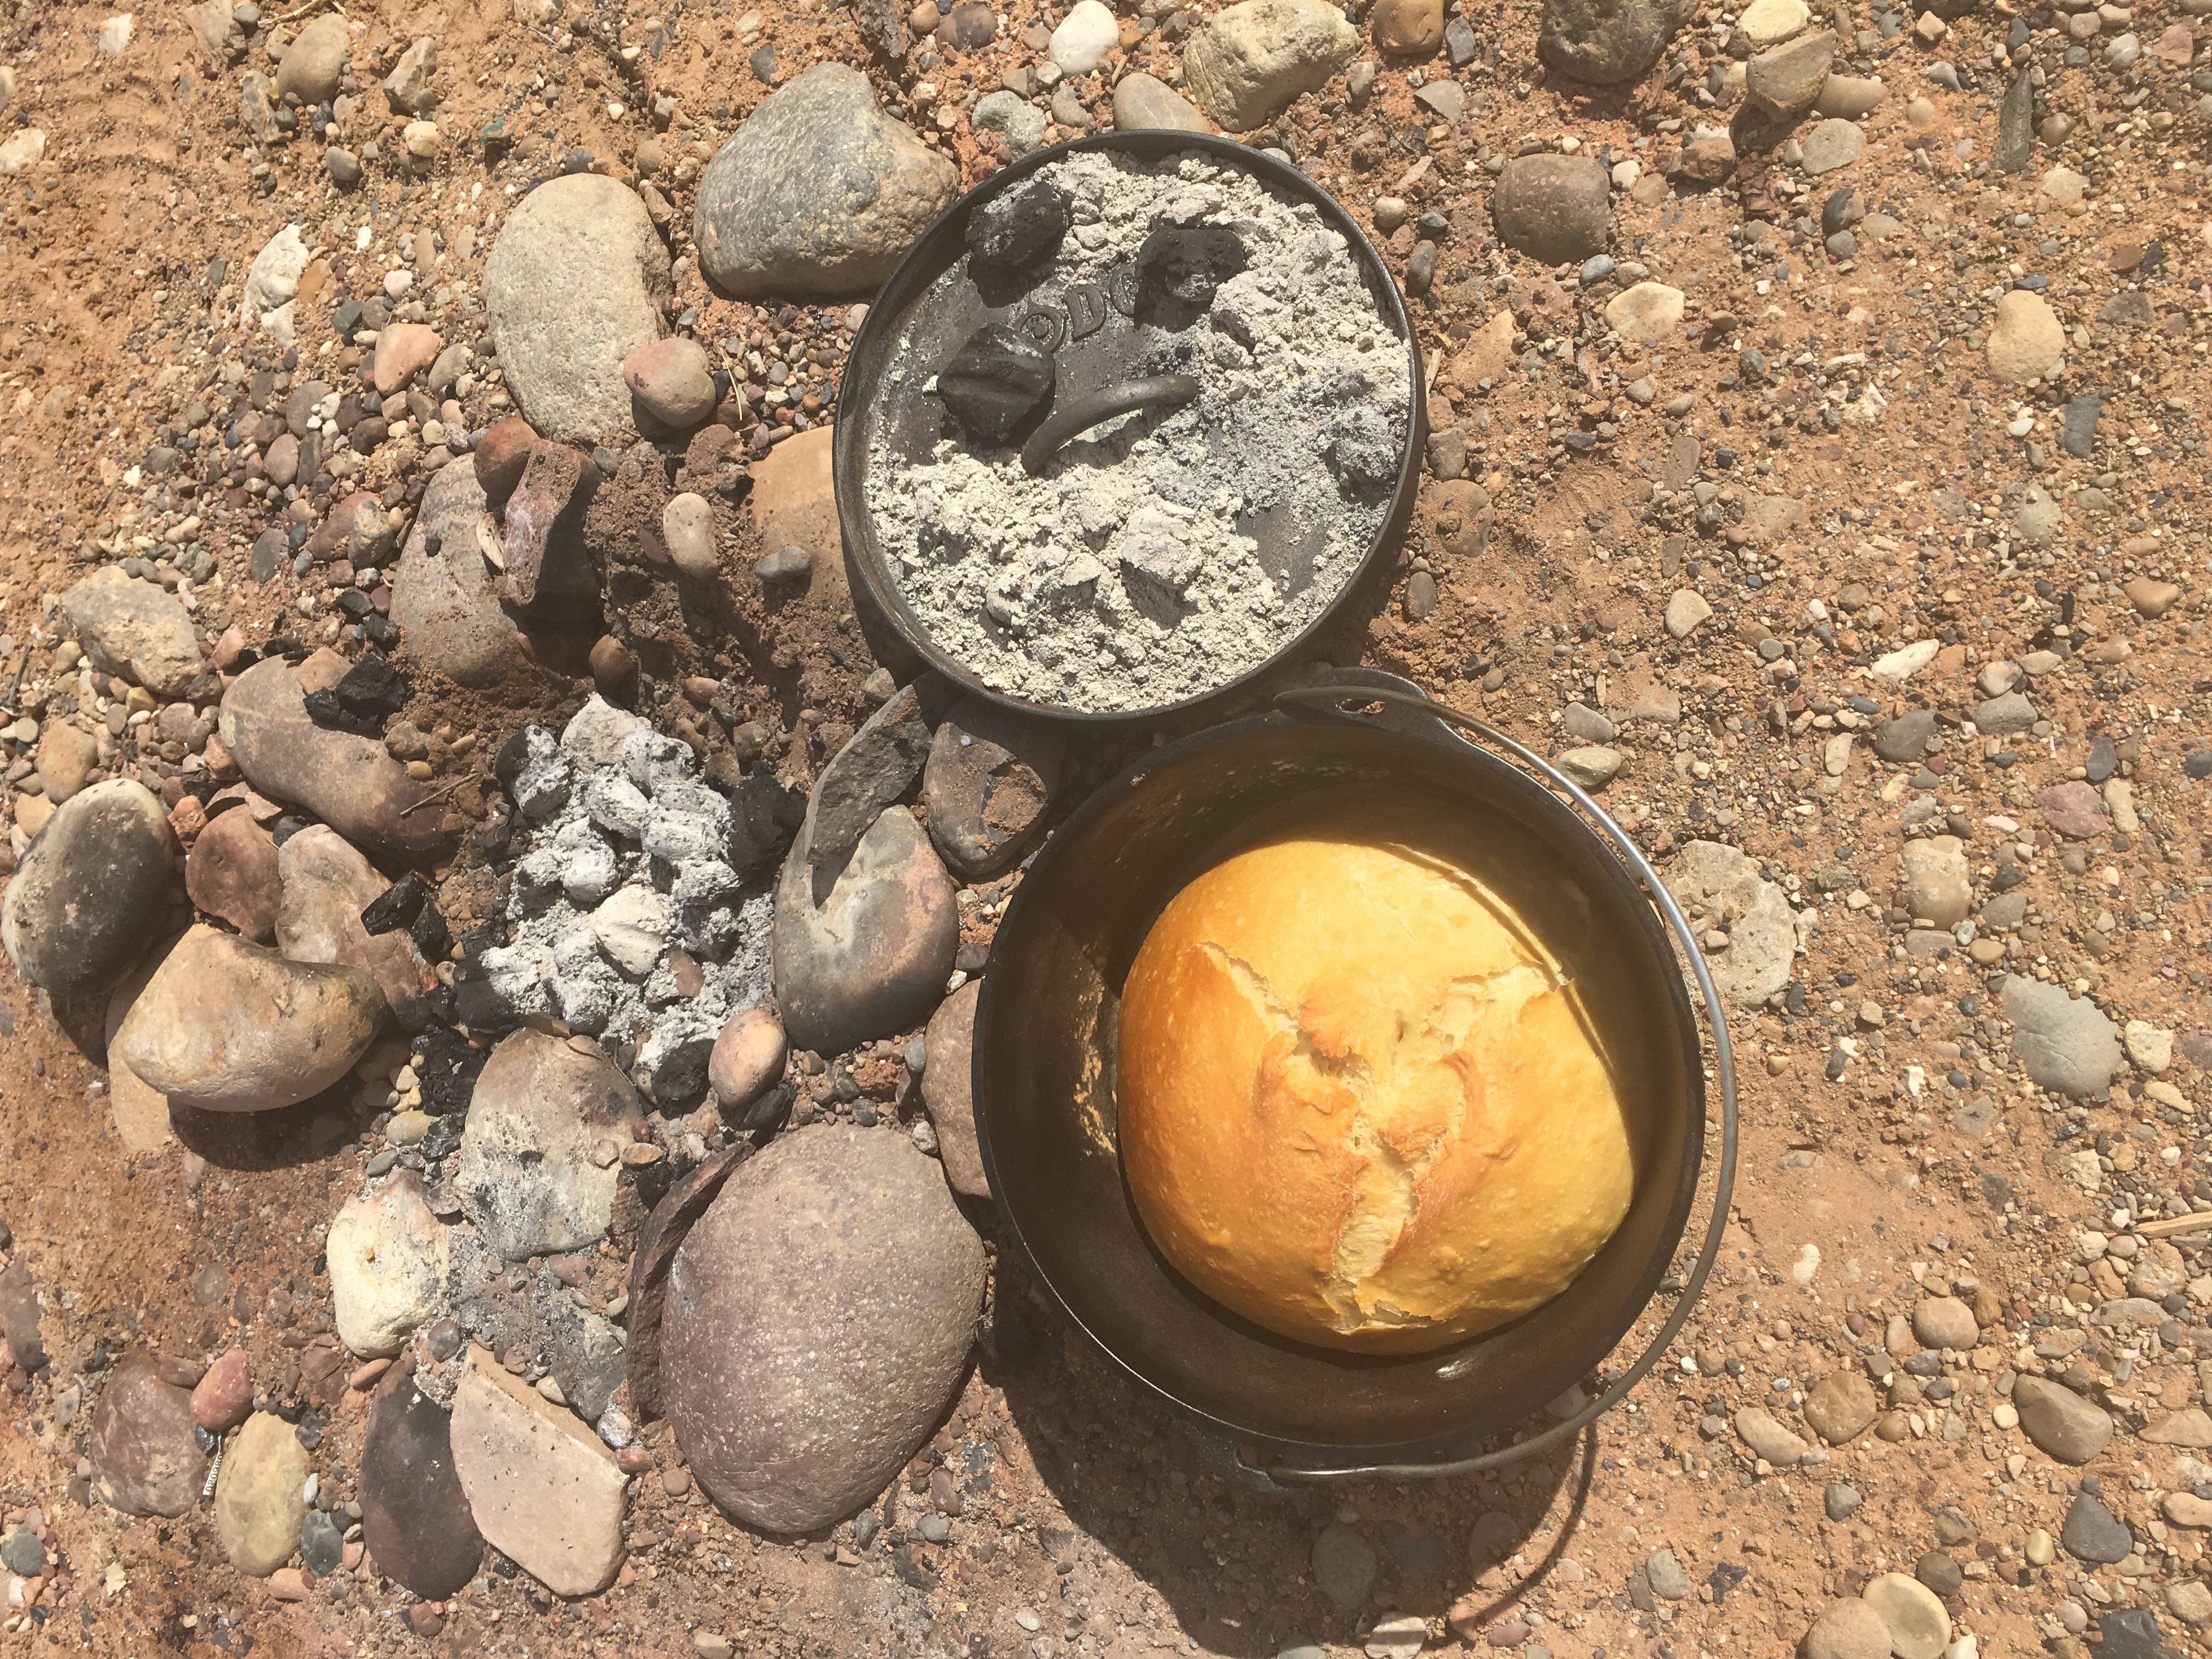
After about 15 minutes of cooling, I took a knife and slid it around the sides of the bread to loosen it up, pried it against the loaf and hoped for the best – basically hoped that it wouldn’t stick to the bottom! And it popped out almost perfectly – just one little piece stuck to the bottom in a spot where I didn’t flour it enough. The recipes call for cornmeal to be sprinkled on the bottom and I’d imagine that would work a bit better than normal flour as an anti-sticking agent. We let the loaf cool a bit longer outside of the dutch oven, and marveled at it’s round, pretty shape.
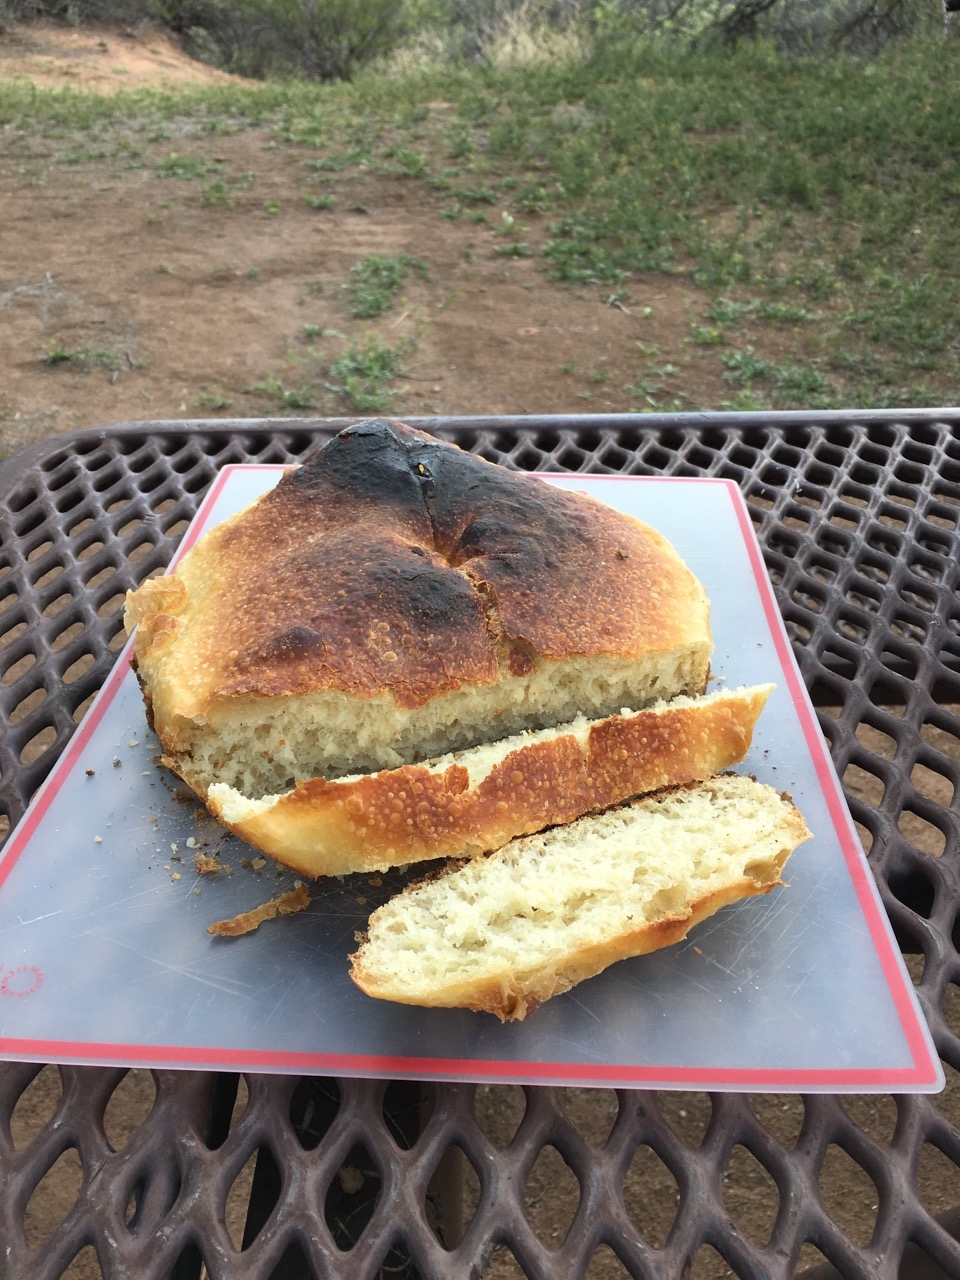
I HAVE MADE BREAD! And not from a bread making machine, but from a little flour, a little water and starter, some coals and my own two hands. The bottom of the bread was slightly blackened – perhaps next time I should use a few less coals on the bottom – but otherwise it was cooked perfectly We carved into the loaf and it was doughy in the middle, a little crunchy on the outside crunch, with delicious pockets of air and a nice sour taste. Just like the loaves at Boudin down by the Wharf at home. Still can’t quite believe it.
And then, I thought, what if this is a fluke? Beginner’s luck? I’ll never be able to repeat this. So last week, I took another stab at it, roughly following the same recipe, though the times that I allowed the dough to rise were quite different – we just can’t sit around on this trip waiting for dough to rise at specific intervals, so I have to work with the schedule and the materials that I’ve got. And shockingly, I repeated the performance. Once may be a fluke, but twice means that it’s official. I am a camping bread baker.
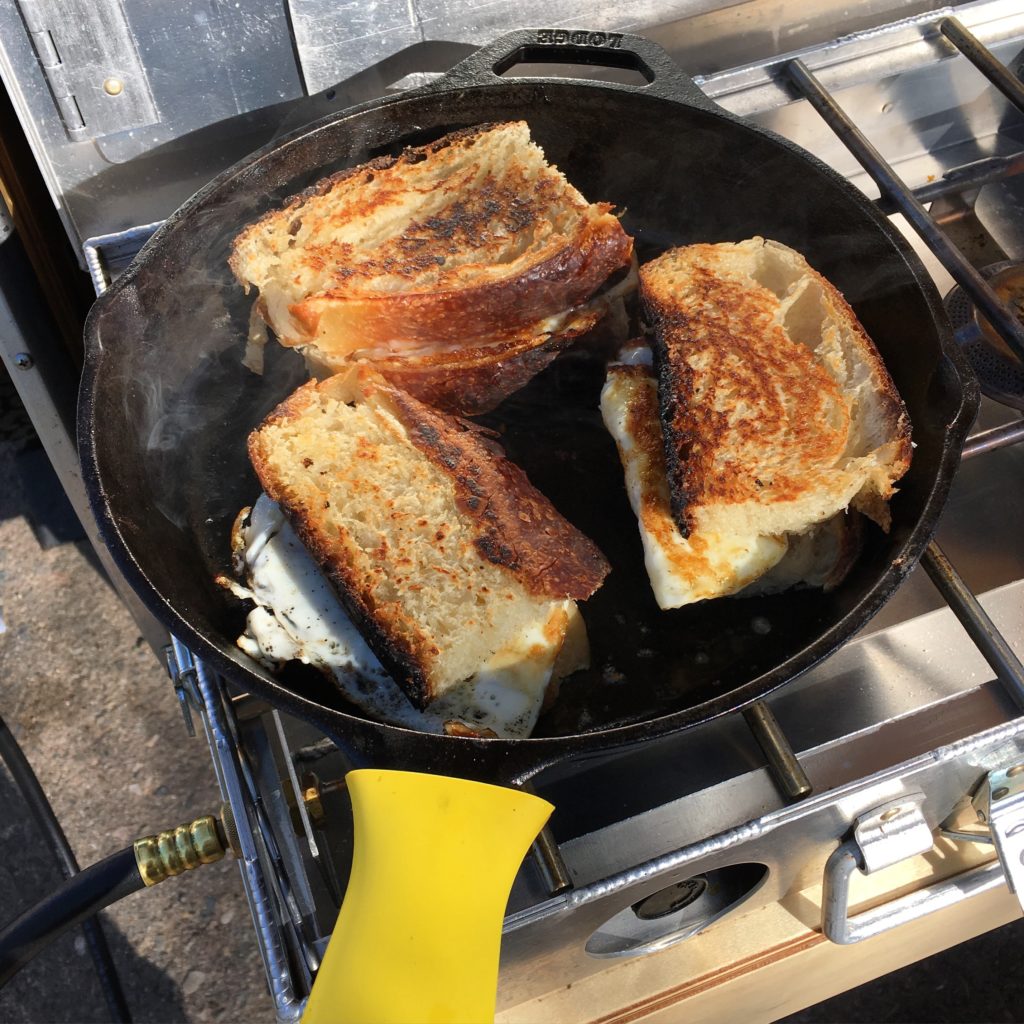
The second loaf was a little less sour, a little less fluffy and bubble-filled, so my starter was probably a bit less active than the first time around, but it was still absolutely delicious and didn’t last too long – we gobbled it up pretty quickly. We’ve made egg sandwiches with the bread, grilled cheese sandwiches, dipped the bread in olive oil and balsamic vinegar, and used it as a delicious accompaniment to chili. Mm mm good.

Lesson here: perhaps the exact specifications, weight measurements (rather than volume), precision and perfect execution are required to make the picture perfect souffle or macaron, but when out on the road, the range or the homestead, use a bit of common sense, using your sense of sight and smell to evaluate how the process is coming along, and you should be alright.

Coconut, guarding the baking bread from any possible thieves.
I’ll take some time to cohesively put together a short recipe for this sourdough camp bread and share it soon!
BY Jackie
BLOGGED FROM Bakersfield, California
