How to Elope in a National Park: A Complete Planning Guide
Yes, you can elope in a national park – but it takes more than picking a gorgeous overlook and showing up with your partner.
The park you choose, the exact spot inside it, the paperwork on both the marriage side and the park side, your timing, your travel plan, and your preparation for the day itself all shape whether the experience matches what you pictured.
None of that is complicated once you understand the order to tackle it in, which is exactly what this guide walks you through, from the very first decision to the moment you’re standing at your ceremony spot with rings in hand.
Decide What You Want Your National Park Elopement to Feel Like

Before you open a single park website, picture the actual day.
Quiet vows beside an alpine lake at sunrise, just the two of you? A hike before the ceremony?
A handful of family members along, or a whole day of exploring rather than a single scheduled event? There’s no template to follow here – the point is to build a day around what genuinely feels meaningful to you, not to recreate a stranger’s wedding photos.
Decide How Many People You Want With You
Start with the guest list, because it quietly shapes almost every decision that follows.
A just-the-two-of-you elopement gives you far more flexibility – you can choose a quieter spot, hike farther in, or change locations mid-day without coordinating anyone else’s schedule.
Bringing family or close friends adds meaning, but it also adds logistics: more parking, an easier walking route, and a location that can comfortably hold everyone. Decide who you genuinely want there before you fall for a location.
Choose Your Ideal Level of Adventure
Be honest with yourself about how physical you want the day to be. Experienced hikers might love a longer trail with real elevation gain, exchanging vows partway along the route and continuing to explore afterward. But a difficult hike isn’t a requirement for an adventurous-feeling elopement — an accessible overlook paired with a scenic drive, a picnic, or a short sunset walk can feel just as outdoorsy.
Weigh your own fitness and hiking experience, plus anyone else joining you — a trail that suits two seasoned hikers may not work for a guest with mobility limitations. The right adventure level is the one that excites you, not the one that photographs best.
Decide Whether You Want a One-Day or Multi-Day Experience
Your elopement doesn’t have to start and end with the ceremony. A single day works well if you want something simple: get ready, drive in, exchange vows, take photos, and celebrate. A multi-day trip gives you room to arrive early, explore without wedding-day pressure, hold the ceremony on a separate day, and stretch the trip into a honeymoon.
Extra days let you actually experience the destination instead of rushing everything around a few hours of photography, and give you room to adapt if the weather turns.
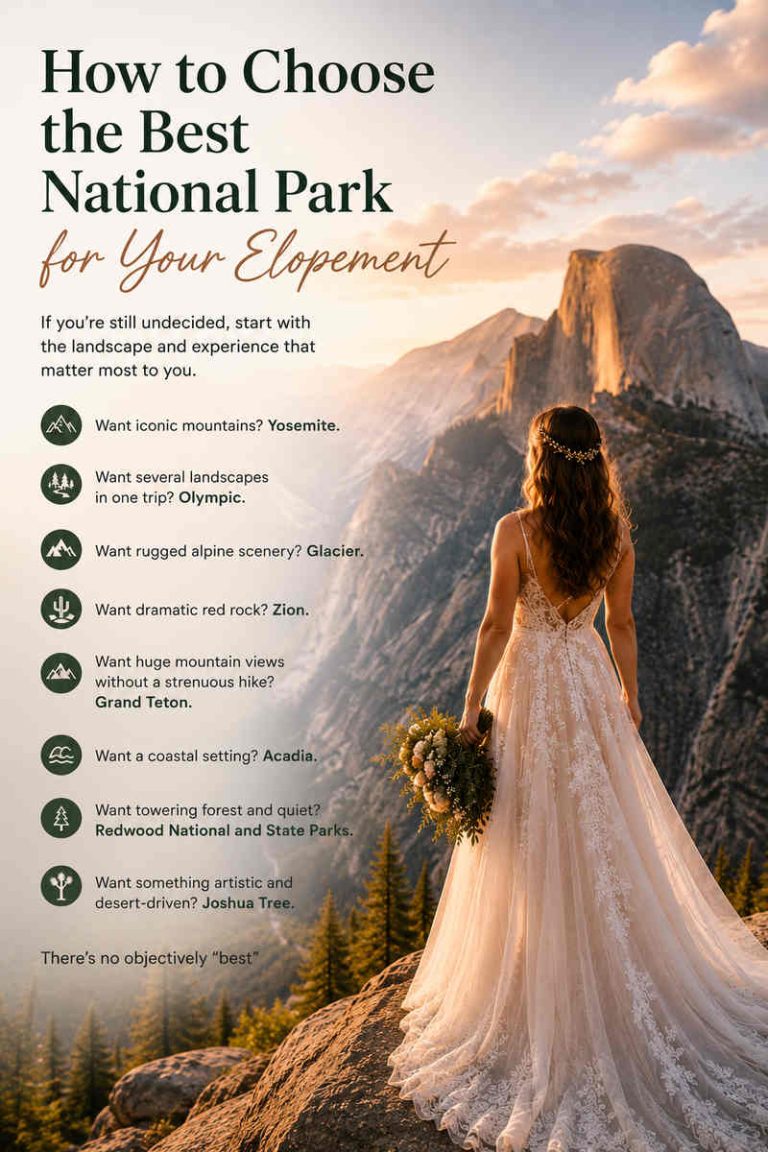
Choose a National Park That Fits Your Elopement
Once you know what you want the day to feel like, comparing parks gets much easier. The right question isn’t “which park looks the most beautiful?” It’s “which park actually makes this kind of elopement possible?” That means weighing landscape, accessibility, travel, season, and weather together, not scenery alone.
Match the Landscape to Your Vision
Start with the scenery that genuinely draws you — mountains and alpine lakes, dramatic desert, dense forest, rugged coastline, or wide-open plains. Then think past the backdrop to what you’ll actually be doing there. A park built for hiking suits an active day; accessible viewpoints suit a relaxed one. The landscape should support the day you want, not just supply a pretty background for it.
Consider Travel and Accessibility
A remote park sounds romantic until you’re calculating how long it actually takes to reach your ceremony spot. Map out the real journey from home to the park, and from your accommodation to the specific area you’ll spend your day in — driving distance, airport access, road conditions, parking, and walking distances all factor in.
Accessibility deserves the same attention. A location that demands a long or difficult hike may not work if you’re bringing parents, kids, or anyone with mobility limitations — and choosing an easier one doesn’t make the day any less adventurous. It just makes it inclusive.
Think About Season and Weather
The same park can feel like a completely different place depending on when you visit. Snow might create exactly the landscape you’re picturing, while another couple would rather have summer access to high-elevation trails or fall color moving through the forest.
Bring weather into the park decision early, not as an afterthought once everything else is booked. You don’t need perfect weather — you need a realistic sense of what you’ll likely encounter, and whether that fits the day you want.
Don’t Choose a Park Based Only on Photos
This is the easiest mistake to make. A photo can show a breathtaking viewpoint without hinting that it requires a long hike, offers almost no parking, or is closed for part of the year — social media tends to capture a destination’s most spectacular five minutes, not the reality of getting there. Use photos to find places that spark your interest, then research what actually visiting them involves.
By now you should have a clear sense of what you want the day to feel like, and a park — or a short list of them — that could realistically deliver it. Next, find out what you’re actually allowed to do once you get there.
Research What You Can Actually Do in Your Chosen Park
Choosing a park is only the starting point. Before you book flights, accommodation, or vendors, confirm that the elopement you’re picturing is genuinely possible in that specific location. National parks are public land, and the rules governing ceremonies, approved sites, and seasonal access are set park by park — two parks with equally stunning scenery can operate under very different requirements.
Check the Park’s Official Information
Go to the park’s own website before leaning on wedding blogs, social posts, or a photographer’s marketing page. Look for sections covering weddings or ceremonies, special use permits, current alerts, closures, and general visitor information.
Pay close attention to anything that could reshape your plans: whether ceremonies are permitted at all, which locations qualify, group-size limits, application requirements, time restrictions, and anything explicitly prohibited. Requirements genuinely vary from park to park — some limit ceremonies to a short list of designated sites, others are more flexible, and many require some form of advance authorization. Don’t assume a rule you read in an older article still applies; verify current details directly with the park before locking in anything nonrefundable.
Check Your Preferred Ceremony Area
Once you have a general area in mind, dig into that specific spot rather than the park as a whole. A park might allow elopements broadly but restrict ceremonies to particular overlooks, meadows, beaches, or amphitheaters — and each of those sites can carry its own guest limit, time restriction, or seasonal availability.
It also helps to remember that a ceremony site inside a national park is still, in almost every case, a public place. A permit doesn’t convert a scenic overlook into your private venue for the day; other visitors will typically still have access to it. Before committing to one particular viewpoint, find out:
- Is a ceremony allowed there at all?
- Is a permit or authorization required?
- How many people can attend?
- How long can you use the area?
- Is parking realistically available?
- Will the area be accessible on your chosen date?
- Will other visitors still be able to use the space?
Those answers will tell you whether the location genuinely belongs in your plan.
Check Seasonal and Access Restrictions
A beautiful location only helps if you can reach it on the day you’re getting married. Check the park’s current conditions page for road closures, shuttle requirements, trail status, snow, construction, and wildfire-related restrictions. A permit doesn’t guarantee access through a closed road — those are two separate approvals, and it’s worth confirming both.
This matters even more when you’re planning months ahead, since conditions can shift after your original plans are set. A good habit is checking the park again shortly before your trip, and once more the morning of your elopement if the park publishes current alerts — that gives you a chance to react instead of discovering a problem after you’ve arrived.
Choose Your Elopement Location Inside the Park

With a clearer picture of what the park allows, you can narrow in on the location that actually fits your day — not just your camera roll.
Scenic Doesn’t Always Mean Practical
The most dramatic viewpoint isn’t automatically the best place to say your vows. It might require a long hike, offer no shade, have brutal parking, draw heavy crowds, or sit exposed to strong wind. A slightly less dramatic spot down the road might hand you more time, easier access, and a far calmer morning.
Think through the whole experience, not just the photograph: Can you reach it comfortably in your wedding clothes? Is there enough time to get there without rushing? Can your photographer carry their gear in? Is there somewhere to wait if you arrive early? What happens if the weather turns? Those practical questions often reveal that the “second-best” view is actually the smarter choice.
Consider Your Guests Before Choosing a Trail
If family or friends are joining you, choose with their abilities in mind, not just yours. A trail that’s easy for two fit hikers can be genuinely hard for an older parent, a young child, or a guest with mobility limitations — even a short trail turns tricky with steep terrain, heat, altitude, or unpredictable weather.
Check walking distance, elevation change, surface conditions, parking, and restroom access, and build accessibility into the location choice from the start rather than trying to retrofit it later.
Think About What Happens Before and After the Ceremony
The ceremony is only one piece of the day. Picture what happens right before and right after — private vows beforehand, portraits afterward, a short hike, a picnic, a scenic drive, dinner nearby. A spot that works beautifully as a five-minute photo stop can feel awkward as the anchor for a five-hour day.
Build outward from the ceremony site, so you’re not spending most of the day stuck in traffic or circling for parking between activities.
By this point you should have a realistic park, a workable ceremony spot, and a clear sense of what could affect your plans. Now it’s time to handle the requirements and commitments you’ll want confirmed before you book anything nonrefundable.
Handle the Requirements Before You Commit to Your Plans
Separate Marriage Requirements From Park Requirements
Before finalizing anything, keep two separate categories in mind: what makes your marriage legal, and what the park requires to hold a ceremony there. They’re related, but they aren’t the same thing, and mixing them up is an easy way to end up with a beautiful ceremony that isn’t legally recognized — or a legal marriage license with nowhere approved to use it.
The legal side of your marriage comes from the state or local jurisdiction where you’re marrying. Depending on where that is, you may need a marriage license, an officiant, witnesses, or other documentation, and some jurisdictions add rules of their own about how and where a ceremony can be performed.
The park layers its own requirements on top of that. Depending on the specific park and location, you may need authorization for the ceremony itself, and you could run into limits on group size, restrictions on the approved location, or rules covering equipment, decorations, or activities. Getting the park’s blessing doesn’t make you legally married, and a marriage license doesn’t automatically grant permission to hold a ceremony anywhere inside a national park. Check both sides separately.
For the marriage:
- Where do you obtain the marriage license?
- How long is the license valid?
- Is an officiant required?
- Are witnesses required?
- Are there waiting periods or other local requirements?
For the park:
- Is a ceremony permitted at your chosen location?
- Is authorization or a special use permit required?
- Are there group-size restrictions?
- Are there location or time restrictions?
- Are there rules around decorations, chairs, flowers, or food?
- Are additional reservations or entrance requirements involved?
Because these requirements vary by jurisdiction and by park, verify current details directly with the appropriate government office and the park itself before you commit to your plans. Our National Park Wedding guide covers the legal side in more depth — the goal here is just knowing which questions to ask.
Pick a Date That Works for the Park, Not Just Your Calendar
Your date shapes far more than you’d expect — how many other visitors you’ll share the space with, and whether your preferred location is even accessible. Instead of asking only “when are we free?”, ask “when will this park actually give us the day we want?”
Think About Crowds
If a quieter experience matters to you, look at weekdays, early mornings, or the shoulder season rather than peak travel weeks. Popular overlooks and trailheads fill up fast during busy periods, meaning scarce parking, longer waits, and less room to breathe during photos. You don’t need an empty park — these are public spaces — but choosing your timing with some care makes it easier to enjoy the moment without waiting for someone else to clear the frame.
Consider Sunrise vs. Sunset
Time of day changes the entire feel of the day. Sunrise tends to bring cooler air, softer light, and fewer people, but it also means an early wake-up and possibly traveling in the dark. Sunset can deliver gorgeous light and a more relaxed pace, though popular spots get busier and you’ll need a plan for the walk back in fading light.
Weigh more than the photos: temperature, your own energy levels, parking, hiking conditions, and how much time you want on either side of the ceremony.
Check Seasonal Access
A date that looks ideal on the calendar might not work for the location you’ve chosen. Before committing, confirm whether the roads, trails, overlooks, shuttles, or facilities you’re counting on are typically open during that season. Snow, heat, storms, wildfire smoke, and construction can all shift access, and seasonal patterns aren’t guarantees — keep checking the park’s current alerts as your date gets closer.
Plan Your Destination Elopement Around the Park
If you’re traveling to reach your park, treat the trip itself as part of the experience rather than a delivery mechanism for one ceremony. A destination elopement works best when you leave enough time and flexibility to actually enjoy the place you traveled to.
Arrive Before the Elopement Day
Where you can, avoid making the ceremony day the same day you arrive at your destination. Getting in earlier gives you time to recover from travel, pick up a rental car, settle into your accommodation, and get familiar with the area — plus a little cushion if a flight is delayed or traffic runs long.
If you’re planning a sunrise ceremony, arriving the day before matters even more — you don’t want a long travel day landing right before an early-morning hike. Use the extra time to check the weather, review current conditions, and get familiar with the route.
Stay Close Enough to Reduce Travel Stress
Your accommodation doesn’t need to be inside the park to be convenient. Look at how long it will actually take to reach your ceremony location at the time you plan to leave — a place that looks close on a map can turn out to be much farther once you factor in park entrances, winding mountain roads, seasonal routes, or shuttle systems.
Staying nearby buys you more time to sleep, get ready, and enjoy the morning instead of losing hours to driving. It also makes your backup plan easier to execute — a shorter trip back gives you more room to adapt if something changes.
Plan Something Beyond the Ceremony
One of the best parts of a destination elopement is that the wedding doesn’t have to be the whole story. After you exchange vows, you could keep hiking, explore another corner of the park, have a picnic, catch the sunset, or find a quiet spot to celebrate together. Some couples stretch the trip into a longer honeymoon.
Choose activities that match your energy and schedule rather than trying to fill every hour. The ceremony may only last a few minutes, but what surrounds it can end up just as memorable.
At this point you’ve verified the requirements, chosen a realistic date, and mapped out how you’ll get to and experience the destination. Next: the people and the schedule that will carry your plan through the actual day.
Book the Vendors You Actually Need

A national park elopement usually doesn’t call for a traditional wedding vendor team, and that’s one of its real advantages — you can build a small team around what actually makes the day easier. For most couples, a photographer and an officiant are the two professionals worth prioritizing; depending on your plans, you might also add a planner, videographer, or hair and makeup artist.
Choose Vendors Familiar With Outdoor Elopements
A national park isn’t a conventional venue, so outdoor experience matters. Your photographer or planner may need to work around hiking, shifting weather, and uneven terrain — someone comfortable working outdoors is far more likely to have already thought through those realities.
When comparing vendors, look past the portfolio and ask whether they regularly work outdoor elopements and whether they’re genuinely prepared for your specific plan — carrying gear on a hike, or showing up ready for a sunrise start.
Ask Vendors About Park-Specific Experience
General outdoor experience is useful; familiarity with your specific park can be even more valuable. Someone who’s worked in that park before often already understands details that don’t show up in a portfolio — how long it takes to move between locations, and where parking gets tight. Worth asking:
- Have you worked in this park before?
- Are you familiar with the location we’re considering?
- How would you structure the day around the park’s access and conditions?
- Are there logistical issues we should know about?
- What would you suggest if our preferred location becomes unavailable?
Even an experienced vendor should still confirm current park rules with an official source rather than relying purely on past visits. Their experience should sharpen your plan, not replace your own research.
Confirm What They Need From You
Before booking, give vendors the practical details: date, approximate guest count, ceremony location, hiking requirements, and expected timeline. Then ask what they need from you — your photographer may want the route in advance, your officiant may need legal paperwork, a planner may need your park documentation.
It’s also worth confirming up front what happens if plans change — whether a vendor can adapt if weather forces a location switch. That clarity now prevents a stressful surprise later.
Build Your Elopement-Day Timeline
A national park can turn a simple-looking day surprisingly time-consuming. Map distances rarely reflect how long it actually takes to enter the park, find parking, walk to a location, or wait out other visitors at a popular spot. A good timeline gives your day structure without turning it into a race.
Build in More Time Than You Think You Need
Resist the urge to plan around the shortest possible travel time. If the map says thirty minutes, that’s before an entrance line, road work, or a full parking lot. The same goes for hiking — a trail that looks quick on paper takes longer in formal clothing or when you’re stopping to take in the view.
Give yourself enough cushion to arrive without immediately worrying you’re late. It’s far better to have a few quiet minutes together before your ceremony than to arrive breathless five minutes ahead of it.
Add Buffer Time for Parking and Hiking
Parking and walking deserve their own line in the schedule, separate from driving. Once your car reaches the trailhead, you still need to find a legal spot, gather your things, use facilities if needed, and make your way to the actual ceremony area — and popular locations often mean extra waiting during busy periods.
If your plan involves more than one location, repeat that calculation for each leg. Three beautiful viewpoints sound better than one until the extra driving and walking eats into the time you meant to spend actually experiencing each place.
Don’t Schedule Every Minute
A good timeline gives your day direction without controlling every second of it. Leave room for things you can’t plan for — stopping because the view stops you in your tracks, a few extra minutes on your vows, waiting out a crowded viewpoint, or just sitting together and taking it in.
If every minute has a task attached, you can end up watching the clock instead of each other. Identify the moments that genuinely need a fixed time — a sunrise ceremony, a shuttle, a reservation — and leave the rest loose.
At this stage you have the people you need, a realistic schedule, and enough flexibility for the park to behave like an actual place rather than a perfectly controlled venue. Next: preparing for the things you can’t control.
Make a Backup Plan Before You Need One
Even a carefully planned elopement can shift once you’re actually there — weather turns, a trail closes, parking fills up, or your chosen spot is busier than expected. None of that means the day has gone wrong. It just means it’s worth deciding, before you arrive, what you’ll do if one piece of the original plan falls through.
Have a Second Ceremony Location
Choose an alternative location ahead of time, not while you’re already standing in bad weather trying to problem-solve. Your backup doesn’t need to match the first choice exactly — a forested clearing or a different approved viewpoint can offer a comparable feeling if your original plan was a mountain overlook. Just make sure it’s genuinely permitted and accessible; don’t assume you can simply move the ceremony elsewhere in the park on the fly.
Leave Extra Time in Your Schedule
A little slack protects the whole day. If your schedule only allows a few minutes between parking, getting ready, and the ceremony, even a small delay knocks everything after it off course. Build breathing room into the important transitions — arriving early isn’t wasted time, it’s room to relax and enjoy being there.
Know What You Will Do If Weather Changes
Decide ahead of time, not once the forecast already looks rough, how much rain, wind, heat, or cold you’re comfortable with. Some couples are happy to say their vows in a light drizzle; others would rather postpone or move to the backup location. Remember weather isn’t the only trigger for a change of plans — wildfire conditions, road closures, and trail damage can affect access too.
Keep Important Documents Accessible
Keep your key documents and confirmations somewhere you can reach without relying on a single device — marriage paperwork, park authorization, reservations, ID, vendor contacts, and accommodation details. Digital copies on your phone help, but carrying physical copies of the important ones is worth the extra weight, and it helps if your partner also knows where everything is stored.
Prepare for Your National Park Elopement
A national park doesn’t come with the conveniences of a traditional venue — no changing room by the ceremony site, no shop around the corner for something forgotten. Pack for the environment and the actual plan, not for a generic wedding.
Documents: identification, marriage-related paperwork, park documentation, reservations, and any other required confirmations.
Clothing: something that works with the terrain and weather, plus a plan for transporting it without wrinkling or damaging it along the way.
Footwear: comfortable shoes for the walk in — you can always change into dress shoes once you’re at the location if that works better for photos or the ceremony.
Water and food: enough for the conditions and the activity level, plus snacks if you’ll be away from services for several hours.
Weather gear: layers, rain protection, sun protection, or gloves, depending on the season — more important than they seem until you’re without them.
Phone and power: download anything you’ll need before you lose signal, and bring a portable charger if your phone is doing double duty for navigation and photos.
Rings and vows: somewhere secure for the rings, and easy access to your vows or notes.
Emergency supplies: a small first-aid kit and anything specific to your environment — altitude, heat, insects, or terrain.
Your actual packing list should reflect your park, season, route, and activities — not a generic wedding checklist.
What to Do on the Day of Your Elopement
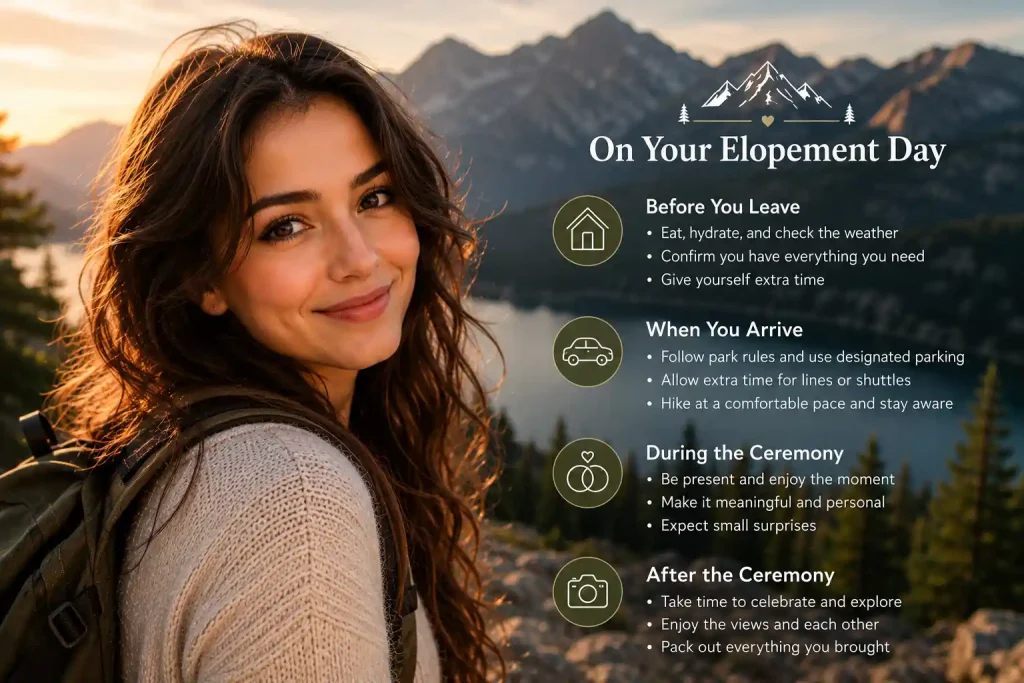
After all the planning, the day itself should feel simpler than everything leading up to it. The big decisions are made — your job now is to follow the plan while staying loose enough to enjoy whatever it hands you.
Before You Leave Your Accommodation
Give yourself more time than feels necessary. Eat something, drink water, check the latest park conditions and weather, and confirm you have your documents, rings, clothing, food, and water. If you’re meeting vendors or guests somewhere, confirm the meeting point beforehand — and leave with enough time that arriving doesn’t turn into a race against the clock.
When You Arrive at the Park
Follow the park’s current instructions, use designated parking, and build in extra time for entrance lines or shuttles if those apply. If you’re hiking in, move at a comfortable pace rather than rushing because the clock is on your mind. Stay alert to current conditions as you go — a closure or a rougher trail than expected is worth adjusting for. A meaningful day matters more than forcing one specific location to work.
During the Ceremony
When the moment arrives, let yourself stop thinking about logistics — you’ve already done the research and prepared for changes. Exchange your vows, rings, or whatever tradition matters to you, and let the ceremony reflect the two of you rather than mimicking a conventional wedding. National parks are shared public spaces, so don’t be thrown if a hiker passes by or the wind picks up at exactly the wrong moment — those small surprises often become part of the story.
After the Ceremony
Resist the urge to immediately move to the next item on the schedule. Take time to celebrate — walk together, take photos, explore, or simply sit somewhere beautiful and let it sink in. You don’t have to complete every planned activity just because it’s written down. Before you leave the park, double-check that you’ve gathered everything you brought.
Your elopement doesn’t need to be flawless to be unforgettable. The weather may shift, the timeline may bend, and the picture-perfect moment may never quite arrive — what matters is that you built a day that feels like yours, in a place you chose on purpose and treated with care.
National Park Elopement Planning Checklist
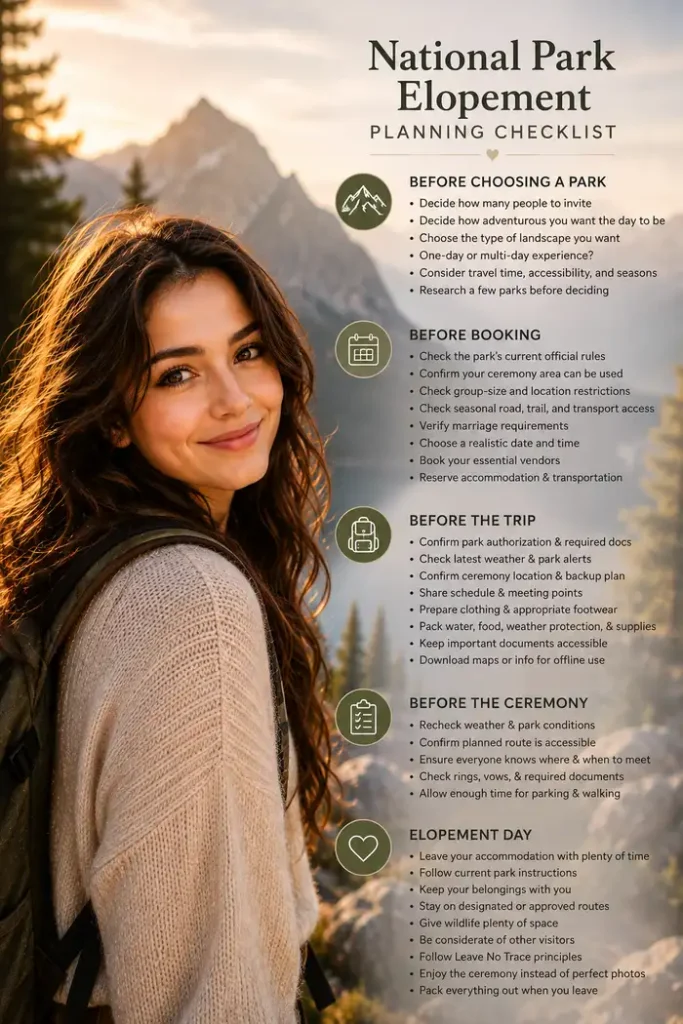
Before choosing a park
- Decide how many people you want to invite.
- Decide how adventurous you want the day to be.
- Choose the type of landscape you want.
- Decide whether you want a one-day or multi-day experience.
- Consider travel time, accessibility, and seasonal conditions.
- Research a few parks before settling on one.
Before booking
- Check the park’s current official rules.
- Confirm your preferred ceremony area can actually be used.
- Check group-size and location restrictions.
- Check seasonal road, trail, and transportation access.
- Verify the marriage requirements for your location.
- Choose a realistic date and ceremony time.
- Book your essential vendors.
- Reserve accommodation and transportation.
Before the trip
- Confirm your park authorization or other required documentation.
- Check the latest weather and park alerts.
- Confirm your ceremony location and backup plan.
- Share the schedule and meeting points with guests and vendors.
- Prepare clothing and appropriate footwear.
- Pack water, food, weather protection, and emergency supplies.
- Keep important documents and confirmations accessible.
- Download maps or other information you may need without cell service.
Before the ceremony
- Recheck the weather and current park conditions.
- Confirm that your planned route is accessible.
- Make sure everyone knows where and when to meet.
- Check that you have the rings, vows, and required documents.
- Allow enough time for parking, walking, and unexpected delays.
Elopement day
- Leave your accommodation with plenty of time.
- Follow current park instructions and stay in permitted areas.
- Keep your belongings with you.
- Stay on designated or approved routes.
- Give wildlife plenty of space.
- Be considerate of other visitors.
- Follow Leave No Trace principles.
- Enjoy the ceremony instead of chasing the perfect photo.
- Pack everything out when you leave.
Frequently Asked Questions
How do I start planning a national park elopement?
Start by deciding what you want the day to look like — guest count, landscape, activity level, and timeframe. Then choose a park that fits those priorities, and research what’s actually possible there before you book anything.
How far in advance should I plan?
There’s no single timeline that fits every couple, since park requirements, popularity, and your own travel plans all vary. Start early enough to research the park, secure any required approvals, arrange travel and vendors, and leave room for things to change.
How do I choose a national park for my elopement?
Choose based on the experience you want, not scenery alone. Weigh landscape, accessibility, travel time, season, weather, activities, crowd levels, and whether the park’s rules actually work with your plans.
How do I choose a ceremony location?
Confirm which areas allow ceremonies under the park’s current rules first, then compare options based on access, group size, parking, hiking requirements, and what you want to do before and after the ceremony.
What should I check before booking?
The park’s current ceremony rules, your preferred location’s availability and restrictions, seasonal access, transportation, group limits, and the marriage requirements for your jurisdiction — confirm all of it before making nonrefundable bookings.
How do I plan a destination elopement in a national park?
Treat the trip and the elopement as one experience. Arrive early when you can, stay somewhere convenient, account for park access and transportation, leave flexibility in the schedule, and plan something beyond the ceremony so you’re not rushing through the destination.
What should I pack?
Pack for your location and activities, not for a generic wedding: appropriate clothing and footwear, water, food, weather protection, key documents, rings, vows, phone and power, navigation info, and basic emergency supplies.
How much time should I allow?
Allow for the whole experience, not just the ceremony — travel, parking, walking or hiking, getting ready, photos, and unexpected delays. A flexible schedule generally serves you better than one built around the shortest possible timeframe.
What if my planned location becomes unavailable?
Use your backup plan. Choose an alternative location in advance and make sure it’s genuinely permitted and accessible. If conditions shift unexpectedly, be willing to adjust the location, timing, or activities rather than forcing a plan that’s no longer safe or practical.
Conclusion
Learning how to elope in a national park really comes down to building the day in the right order. Decide what you want the experience to feel like, choose a park that fits that vision, and find out what you can actually do there. Verify the requirements, choose a date and location that work with the park’s conditions, plan your destination logistics, and bring in vendors who understand outdoor elopements. Then build a flexible timeline, prepare for the things you can’t control, and leave yourself enough room to actually enjoy the day.
Choose the experience, then the park, then verify what’s possible, then the location, then the requirements, then the date, then the trip, then the vendors, then the timeline, then the backup plan — and finally, the day itself.
The goal was never a perfectly controlled wedding. It’s a day that feels like the two of you, in a place worth leaving exactly as beautiful for the people who come after you.