
Zion National Park Tips First Time: Logistics Guide
Most first-time visitors to Zion National Park don’t struggle on the trail. They struggle in the parking lot at 9 AM, staring at a full lot, with no shuttle ticket, no Angels Landing permit, and no idea where the Narrows trailhead is. The park itself is forgiving. The logistics are not.
These Zion National Park tips for first-time visitors are built around one principle: your trip succeeds or fails before your boots hit the trail. This guide covers the complete Zion Canyon Shuttle system, where to park in Springdale, how the Angels Landing permit lottery actually works, how to get in even without a permit, and what most guides miss entirely about Narrows safety. Whether you’re planning a one day Zion itinerary first time or a multi-day stay, every decision below is operational — no scenic filler, just execution.
Master Quick-Reference Checklist — Read Before You Arrive

- Shuttle season: March 7–November 28, 2026 (plus December 26–January 2 holiday service)
- First shuttle benchmark: Aim to board by 7:30 AM to avoid peak queues
- Permit fee reminder: $6 application fee + $3 issuance fee via Recreation.gov
- Water minimum: Carry at least 4 liters for any Narrows entry
- Backup plan: If Angels Landing permit fails, Scout Lookout is permit-free and worth the hike
The most important Zion mistakes happen before your hike even starts. Here is how to avoid every one of them.
The Shuttle & Parking Blueprint: Your Zion Canyon Shuttle System Guide
Understanding the Zion Canyon Shuttle system is the single most important piece of logistics knowledge you need before visiting. First-time visitors routinely arrive at the park, find no parking, wait 45 minutes in a shuttle queue, and then discover they boarded the wrong shuttle entirely. This section gives you the complete picture — two separate transit systems, how to move between them, how to avoid the worst queues, and the Pa’rus Trail bypass that most guides never mention.
How the Two-System Structure Works
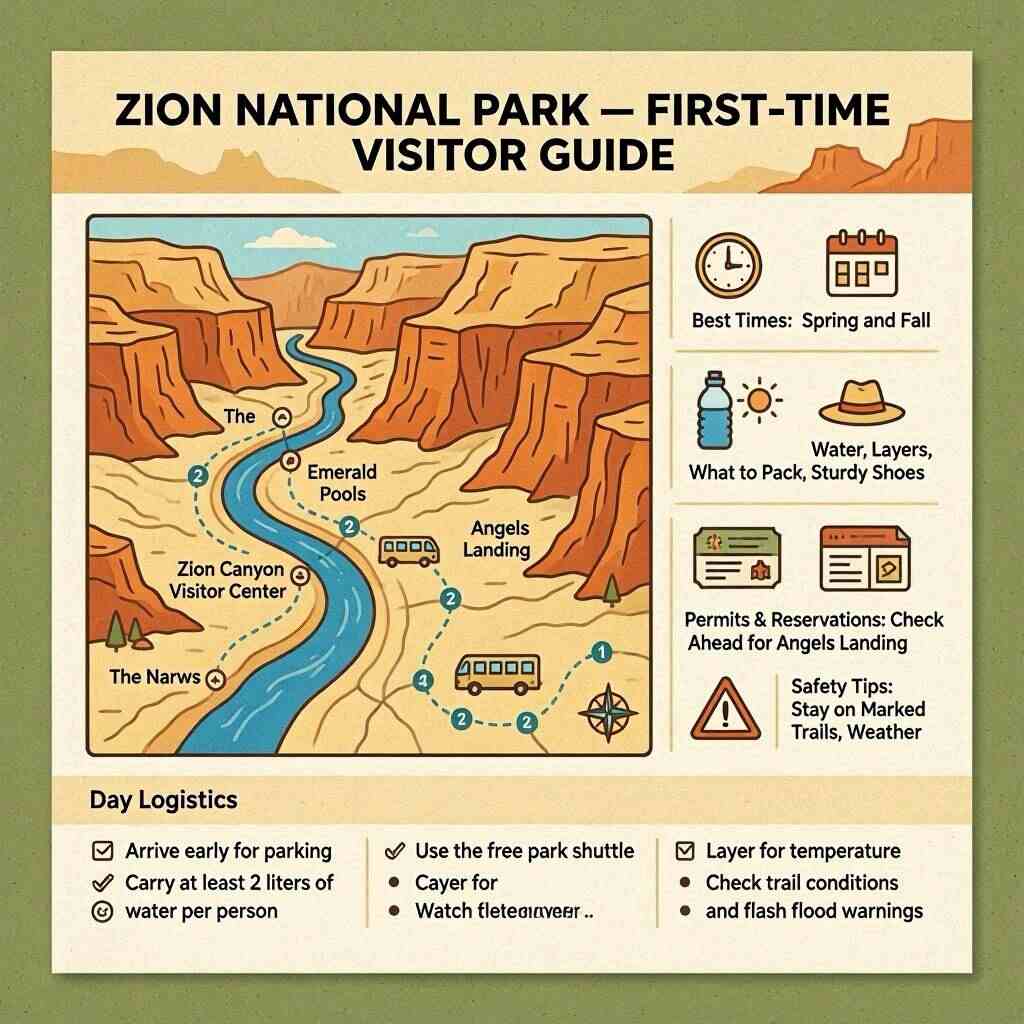
Zion runs two entirely separate shuttle systems, and confusing them costs first-timers significant time. The Springdale Town Shuttle runs through the town of Springdale and connects paid town parking lots to the park’s pedestrian entrance. It is free to ride and does not require any reservation or ticket. The Zion Canyon Shuttle is the in-park system that carries visitors from the Visitor Center through nine stops along Zion Canyon Scenic Drive — including the Narrows trailhead at Temple of Sinawava and the Angels Landing trailhead at The Grotto.
During peak season (spring through fall), private vehicles cannot drive Zion Canyon Scenic Drive. The canyon shuttle is the only way to reach the major trailheads. This is not optional, and it catches visitors off guard every season.
Seasonal Operating Windows and First/Last Departures
For 2026, the Zion Canyon Shuttle operates from March 7 through November 28, with additional holiday service from December 26 through January 2. Outside these windows, visitors can drive their own vehicles into Zion Canyon — a significant logistical advantage for winter visitors.
During peak season, the canyon shuttle begins service around 6:00 AM and runs until approximately 11:00 PM, with frequency increasing to every 6–7 minutes during midday peaks. The first departures of the day carry the lightest loads. If you board the Visitor Center shuttle before 7:30 AM, you will step onto a manageable queue. By 9:00 AM, wait times at the Visitor Center shuttle stop regularly reach 20–30 minutes. Plan your arrival around this window, not around sunrise.
Stop-by-Stop Zion Canyon Shuttle Breakdown
For first-time visitors, understanding what each shuttle stop actually serves can eliminate unnecessary riding, missed trailheads, and return-trip confusion.
| Shuttle Stop | Primary Access | Best For |
|---|---|---|
| Visitor Center (Stop 1) | Main boarding point | All visitors |
| Human History Museum (Stop 2) | Pa’rus Trail access | Walkers and cyclists |
| Canyon Junction (Stop 3) | Scenic photography location | Sunrise and sunset views |
| Court of the Patriarchs (Stop 4) | Short viewpoint trail | Quick stops |
| Zion Lodge (Stop 5) | Lodging and food services | Overnight guests |
| The Grotto (Stop 6) | Angels Landing, West Rim Trail | Permit hikers |
| Weeping Rock Area (Stop 7) | Access varies by trail conditions | Check current closures |
| Big Bend (Stop 8) | Narrows viewpoints | Photography |
| Temple of Sinawava (Stop 9) | Riverside Walk and Narrows | Narrows hikers |
Families using strollers generally find Stops 1, 2, 5, and 9 the easiest to navigate because they provide flatter terrain and wider walking surfaces.
A common first-time mistake occurs on the return trip. Hikers finishing Angels Landing between 2 PM and 5 PM often encounter the day’s longest shuttle lines at The Grotto. If your schedule allows, either return before 2 PM or stay later and board after 5:30 PM when congestion usually decreases.
The Springdale-to-Zion Transit Pipeline: How Visitor Movement Actually Works
This is the gap every competitor misses. Understanding the physical path from a Springdale parking lot to a canyon trailhead requires knowing five distinct stages — and the walking segments between them.
Springdale-to-Zion Free Transit Pipeline Flowchart
STAGE 1: Springdale Town Shuttle Stop (board at any in-town stop)
         ↓ [Ride town shuttle — free, no ticket required]
STAGE 2: Pedestrian Bridge / South Entrance Area
         ↓ [Walk across the pedestrian bridge into the park — ~2 minutes]
STAGE 3: Entrance Station Pass Scan
         ↓ [Have your America the Beautiful pass or entry pass ready to scan]
STAGE 4: Visitor Center Plaza (Zion Canyon Shuttle Stop 1)
         ↓ [Board the Zion Canyon Shuttle — this is the in-park system]
STAGE 5: Stops 2–9 Along Zion Canyon Scenic Drive
         ↓ [Ride to your trailhead: The Grotto (Stop 6), Weeping Rock (Stop 7),
            Big Bend (Stop 8), Temple of Sinawava / Narrows (Stop 9)]
The pedestrian bridge crossing and entrance station scan are the steps most visitors don’t anticipate. You walk off the Springdale shuttle, cross the bridge on foot, scan your park pass at the entrance station, and then walk to the Visitor Center plaza to board the canyon shuttle. This takes approximately 8–10 minutes including the pass scan. Budget for it.
The Zion Transit Execution Framework
- Choose Your Parking Strategy — Park in a Springdale paid lot or the Visitor Center lot (see parking section below). Do not attempt to park at trailheads; no trailhead parking exists in the canyon.
- Reach the Entrance Station — If using Springdale parking, board the town shuttle and ride to the pedestrian entrance. If you parked at the Visitor Center, walk directly to the canyon shuttle stop.
- Transfer to the Canyon Shuttle — Board at Visitor Center Stop 1. Each stop is numbered and announced; maps are posted at every stop.
- Execute Your Destination Plan — Ride to your trailhead. Ask a ranger at the Visitor Center which stops serve your planned trails if you’re uncertain.
- Return Before Peak Exit Congestion — The 3:00–5:00 PM return window is the most congested. Hikers finishing afternoon trails can face 20-minute waits at canyon stops. Plan to finish and board return shuttles before 3:00 PM if possible, or after 5:30 PM when crowds thin.
Queue Mitigation: The Pa’rus Trail Bypass
Most guides tell you to arrive early. Here is something more actionable. During peak periods, if you are already inside the park or have parked at the Visitor Center, you can walk the Pa’rus Trail — a flat, paved 1.7-mile path — from the Visitor Center area toward Canyon Junction. This path runs parallel to the road and connects to the shuttle route. On days when Visitor Center Stop 1 has significant queues, boarding at a downstream stop (reached by walking Pa’rus Trail) often means a shorter wait and a guaranteed seat. Pa’rus Trail is accessible to pedestrians and cyclists, so e-bike riders use it as well.
Secondary question: Do you need tickets for the Zion shuttle? No. As of 2026, neither the Springdale Town Shuttle nor the Zion Canyon Shuttle requires advance tickets or reservations. You board and ride. Your only required credential is a valid park entry pass at the entrance station — either an America the Beautiful Annual Pass ($80/year, covers all national parks) or a 7-day Zion vehicle pass ($35). Confirm current pass fees at the Visitor Center or nps.gov before arrival, as the National Park Service updates fee schedules annually.
Parking Panic Mitigation: Zion Parking Tips for Springdale
Zion parking tips for Springdale visitors come down to one core insight: the Visitor Center lot fills before 8:00 AM on peak spring and fall days. If you arrive after 8:00 AM on a Saturday in April or October without a Springdale parking plan, you will circle. Here is how to avoid that.
The Visitor Center Lot is inside the park, free with your entry pass, and offers the most direct canyon shuttle access. It holds approximately 450 vehicles and fills by 7:30–8:00 AM on busy days from March through November. Arriving before 7:00 AM almost always secures a spot.
Springdale Paid Lots are your primary alternative when the Visitor Center fills. Several private and municipal lots operate along State Route 9 through Springdale. Most charge $10–$20 for all-day parking. These lots feed directly onto the Springdale Town Shuttle route.
Springdale Parking Comparison
| Parking Option | Cost | Walk to Shuttle | Typical Fill Time | Best For |
|---|---|---|---|---|
| Zion Visitor Center Lot | Free (with entry pass) | 0 min — direct shuttle access | 7:30–8:00 AM on peak days | Earliest arrivals who want no-hassle access |
| Zion Canyon Visitor Center Overflow | Free (with entry pass) | 5 min walk to Visitor Center stop | 8:30–9:00 AM on peak days | Mid-early arrivals with flexibility |
| Springdale Municipal Lots (multiple) | $10–$15/day | 1–3 min to town shuttle stop | Rarely fills before 10 AM | Most visitors arriving after 8 AM |
| Private Springdale Lots (e.g., near Bumbleberry Inn) | $15–$20/day | 1–5 min to town shuttle stop | Rarely fills | Later arrivals, families who want guaranteed parking |
Arrival benchmark: On weekdays from November through February, you can arrive at 9:00 AM and find Visitor Center parking. On spring and fall weekends, treat 7:00 AM as your parking deadline for the Visitor Center. On peak holidays (Memorial Day, July 4th, Labor Day), Springdale paid lots are your only realistic option regardless of arrival time — arrive by 8:00 AM.
One option visitors overlook: the town of Springdale has free street parking on some residential side streets north of the main tourist corridor. These spots fill by 8:30 AM on busy days but provide a no-cost alternative if you’re willing to walk 10–15 minutes to a shuttle stop.
The E-Bike Alternative Strategy: Renting E-Bikes in Zion
Renting e-bikes in Zion has become one of the most effective queue-elimination strategies available to first-time visitors, and it remains underused. Here is how it works and when it makes sense.
Several outfitters in Springdale rent e-bikes by the hour or full day. Typical pricing runs $35–$55 for a half-day rental and $55–$75 for a full day, depending on the provider. Most rental operations open by 7:00 AM during peak season. Rentals typically include a helmet and basic orientation.
E-bikes are permitted on the Pa’rus Trail inside Zion National Park, which runs from the South Campground area to Canyon Junction near the Human History Museum (Stop 2 on the canyon shuttle). From Canyon Junction, cyclists and e-bike riders must park and board the shuttle to continue into the upper canyon — e-bikes are not permitted on Zion Canyon Scenic Drive during shuttle season.
Shuttle vs E-Bike Decision Matrix
If you’re unsure whether renting an e-bike is worth the additional cost, use this quick comparison.
| Visitor Type | Shuttle System | E-Bike Strategy |
|---|---|---|
| First-time visitor with one day | Good | Excellent |
| Photography-focused traveler | Good | Excellent |
| Family with small children | Excellent | Moderate |
| Budget traveler | Excellent | Poor |
| Peak-season weekend visitor | Moderate | Excellent |
| Visitor staying multiple days | Excellent | Good |
The biggest advantage of e-bikes is not speed. It is queue avoidance. During peak spring and fall weekends, bypassing the Visitor Center boarding line can easily save 30–60 minutes over the course of a day. If your goal is maximizing hiking time rather than minimizing costs, e-bikes become one of the highest-value upgrades available inside Zion.
Where e-bikes genuinely outperform shuttles: The Pa’rus Trail segment. On peak mornings when the Visitor Center shuttle queue stretches 20–30 minutes, an e-bike rider can cover the Pa’rus Trail section in under 10 minutes, reach Canyon Junction, park the bike at the bike rack at Stop 2, and board an upstream shuttle stop with no queue. This shaves 20–30 minutes off the morning transit experience during the busiest windows.
The cost-versus-convenience analysis: If you’re a solo visitor spending one day at Zion and prioritizing Angels Landing or the Narrows, an e-bike rental adds $45–$55 to your trip cost but potentially buys back 45–60 minutes of queue time. For families with young children who cannot hike the upper canyon anyway and plan to spend significant time on Pa’rus Trail (which is flat and stroller-friendly), e-bikes are an excellent value. For visitors planning a full canyon itinerary across multiple stops, the shuttle system is more efficient once you’re past the Visitor Center queue.
Renting process: Reserve a rental 24–48 hours in advance during spring and fall peak periods. Walk-in availability exists during shoulder season but is not reliable on spring weekends. Confirm that your rental provider covers Pa’rus Trail use — all established Springdale rental outfitters permit this route.
Cracking the Permit Code: Angels Landing Permit Lottery Hacks
The Angels Landing permit lottery is the single most anxiety-inducing logistical element for first-time visitors — and also the most misunderstood. Most guides explain that a lottery exists. Few explain how to optimize your application, when to apply for day-before access, how to handle the dead-zone connectivity problem inside the canyon, or what to do if you lose. This section covers every pathway to Angels Landing access, with the backup plan that most competitors never mention.
Understanding the Two Lottery Types
The National Park Service runs two distinct lotteries for Angels Landing permits, and knowing the difference determines your entire permit strategy.
The Seasonal Lottery opens in the months before your intended visit — applications for spring season typically open in January, for summer in April, and for fall in July. This lottery allocates the majority of permits for each season. If you’re planning your trip more than a few weeks out, the seasonal lottery should be your first attempt. Competition is highest here, but so is the volume of permits available.
The Day-Before Lottery opens daily at 12:01 AM Mountain Time and closes at 3:00 PM Mountain Time for permits for the following day. This is where many first-timers focus their effort when they’re already in the area. Permits released through the day-before system are fewer in number than the seasonal allocation, but the competition is also lower — particularly for weekday access during shoulder season.
Both lotteries operate through Recreation.gov. You need an active account with a valid payment method to apply. The application fee is $6 per entry, regardless of whether you win. If selected, the permit issuance fee is an additional $3. Maximum group size per permit is six people. A single application covers your entire group.
Recreation.gov Account Setup
Set up your Recreation.gov account before you arrive in Zion. This is not optional — creating an account in a cellular dead zone at 11:45 PM while trying to apply for a day-before lottery at midnight is a scenario that defeats visitors every season. Complete these steps at home, on reliable WiFi:
- Create your account at Recreation.gov and verify your email address.
- Add a payment method (credit or debit card) and confirm it processes without error.
- Search for “Angels Landing Permit” to familiarize yourself with the permit listing before your application window opens.
- Set a notification or calendar alert for your target application window.
2026 Angels Landing Permit Decision Matrix
Use this table to identify which permit pathway matches your trip planning timeline and situation.
| Entry Method | Application Window | Cost | Group Size Rules | Advantages | Limitations |
|---|---|---|---|---|---|
| Seasonal Lottery | Opens ~1–4 months before visit (varies by season) | $6 application + $3 issuance if selected | Max 6 per permit | Highest permit availability; plan trip around confirmed access | Must plan far in advance; no guarantee of selection |
| Day-Before Lottery | 12:01 AM–3:00 PM MT, day before your hike | $6 application + $3 issuance if selected | Max 6 per permit | Flexible for travelers already on-site; lower competition on weekdays | Fewer permits available; requires midnight timing optimization |
| Guided Commercial Tour | Book through authorized NPS concessionaires | Varies by operator ($150–$300+ per person typical) | Depends on operator | Permit secured through operator; guided safety support | High cost; less flexibility; guide-led itinerary |
| Scout Lookout (Permit-Free) | No lottery; open access | Park entry fee only | No group limit | No permit required; available every day; significant scenic value | Does not include the iconic chain section or summit |
Connectivity Strategy: The Dead-Zone Problem
Here is what no competitor explains: the canyon area around Angels Landing has extremely limited cellular coverage. If you’re staying at Zion Lodge, camping at Watchman or South campground, or spending the night in the canyon area, your ability to apply for a midnight day-before lottery depends on whether you have reliable signal.
Sprint-based and T-Mobile coverage in Zion Canyon is generally better than AT&T or Verizon in the canyon bottom. However, no carrier provides consistent 4G service throughout the canyon.
Your connectivity optimization options:
- Apply from your Springdale lodging before entering the canyon. Springdale proper has reliable coverage across all major carriers.
- Apply from the Zion Lodge lobby area, which has WiFi available to guests.
- Set up the Recreation.gov application on your phone while connected to WiFi, so the page is loaded and ready to submit without a new data connection at midnight.
- If you have a Springdale Airbnb or hotel room, this is the optimal location — apply from there before or after entering the canyon.
The Permit Backup Strategy Framework ensures you always have a plan regardless of lottery outcome:
- Seasonal Lottery — Apply in the appropriate seasonal window. High availability, maximum planning time.
- Day-Before Lottery — Apply at 12:01 AM MT from a location with reliable connectivity. Springdale lodging is ideal.
- Connectivity Optimization — Position yourself in Springdale the night before your intended hike to ensure lottery access.
- Scout Lookout Contingency — If both lotteries fail, hike to Scout Lookout. The view and experience are genuinely excellent, and the hike requires no permit.
The Day-Before Application Workflow: Do You Need a Permit to Enter Zion?
Understanding whether you need a permit to enter Zion depends entirely on which trail you’re planning. You do not need a permit to enter Zion National Park itself — the park entry pass ($35 for a 7-day vehicle pass, or covered by an America the Beautiful Annual Pass) is your only requirement for park access. You also do not need a permit for the vast majority of trails inside the park, including Emerald Pools, Canyon Overlook, Riverside Walk, and Pa’rus Trail.
The permit requirement is specific to Angels Landing above Scout Lookout, the chain section of the trail. The permit checkpoint is located at Scout Lookout — a designated rest area approximately 1.8 miles from the West Rim trailhead. Rangers check permits at this point. Hikers without a valid Angels Landing permit must turn around at Scout Lookout.
Daily application timeline for the day-before lottery:
- 12:01 AM MT: Application window opens — apply immediately for maximum chances.
- 3:00 PM MT: Window closes. Applications submitted after 3:00 PM are not accepted for the next day.
- Notification: Winners are notified by email after the selection runs. Check your Recreation.gov account and email after the window closes.
- Permit validity: Angels Landing permits specify a date and time window. You must enter the chain section during your designated window or the permit is forfeited.
Scout Lookout: The Permit-Free Route Worth Hiking Regardless
Scout Lookout sits at the top of Walter’s Wiggles — 21 tight switchbacks that are among the most memorable sections of trail in Utah — at an elevation of approximately 5,990 feet. The permit checkpoint here marks the boundary between the free section of the hike and the permitted chain section above.
What visitors who lose the Angels Landing lottery often don’t realize: Scout Lookout is an outstanding destination in its own right. The panoramic views of Zion Canyon from Scout Lookout are nearly as dramatic as those from the Angels Landing summit. On a busy day, the lookout is less crowded than the summit, and you spend less time on exposed chain sections above other hikers.
The round-trip hike from the Grotto trailhead to Scout Lookout and back covers approximately 3.6 miles with about 1,050 feet of elevation gain. Moderate fitness is sufficient. The chain section above Scout Lookout adds another 0.5 miles each way and approximately 400 additional feet of gain on exposed, heavily-trafficked terrain.
The honest comparison: If you have the permit, the Angels Landing summit is a bucket-list experience. If you don’t, Scout Lookout makes for an excellent, uncrowded half-day hike that most visitors rank as one of their Zion highlights. Do not let a failed lottery result cause you to skip the hike entirely.
Mastering the Narrows: Zion Narrows First Time Tips for Safe Execution
The Narrows is Zion National Park’s most iconic hike, and for first-time visitors it is also the most misunderstood. The Zion Narrows first time tips that matter most are not about scenery — they’re about gear selection, flood risk assessment, water safety, and knowing when to turn around. Can beginners hike the Narrows? Yes, with the right preparation. Can you hike it unprepared? Technically yes. Should you? No.
This section covers the bottom-up route from Temple of Sinawava, gear requirements, flash flood monitoring, the turnaround decision framework, and the cyanobacteria water safety reality that virtually no competitor addresses.
The Bottom-Up Route: What First-Timers Are Actually Hiking
There are two ways to hike the Narrows. The top-down route begins outside the park at Chamberlain’s Ranch and requires an overnight permit. First-time visitors hiking a day trip are doing the bottom-up route, which begins at the Temple of Sinawava (Stop 9 on the Zion Canyon Shuttle — the last stop).
From Temple of Sinawava, the paved Riverside Walk covers 1.0 mile to the point where the trail enters the Virgin River itself. At this transition, the trail disappears into the water. You are now walking in the river, through canyon narrows, for the remainder of the hike. There is no maintained trail — the river bottom is your path.
Most day hikers turn around somewhere between 1.0 and 3.0 miles upstream from the Riverside Walk endpoint. The landmark that most first-timers use as a reasonable turnaround point is Big Springs, approximately 1.5 miles upstream from where the river hiking begins. Big Springs is a visible seep on the canyon wall where water flows out of the rock — it’s a clear, identifiable waypoint. Beyond Big Springs, the Narrows becomes significantly narrower and more physically demanding.
The full one-way distance to the top-down exit point is approximately 16 miles from the bottom. Day hikers do not complete this route. Plan for a 3–5 mile round-trip river hike for a satisfying first-time Narrows experience.
Gear Packages: What Is Mandatory and What Is Optional
The Narrows Gear Rental Breakdown table below reflects the typical rental packages offered by Zion Adventure Company and similar Springdale outfitters. All gear listed is available for rent at multiple locations in Springdale.
Narrows Gear Rental Breakdown
| Item | Status | Purpose | Rental Availability |
|---|---|---|---|
| Canyoneering Boots | Strongly Recommended | Ankle support and rubber traction on slick wet rock — standard hiking boots lose traction on river rock | Available at most Springdale outfitters; $15–$20/day |
| Neoprene Socks | Strongly Recommended | Thermal insulation in cold river water (Virgin River averages 50–65°F year-round) | Included in most boot rental packages |
| Trekking/Hiking Stick (dry stick) | Strongly Recommended | Balance and depth-testing on uneven river bottom | Available for rent; also available to buy at Springdale outfitters |
| Dry Bag (small, 5–10L) | Recommended | Waterproof protection for phone, keys, wallet, snacks | Available for rent or purchase in Springdale |
| Water Storage (hydration pack or bottles, 4L min) | Required | You must carry your own water — see water safety section | Not rented; purchase at outfitters or bring your own |
What is mandatory in practice: You can legally enter the Narrows in standard athletic shoes without any gear. However, the river rock is slick, the water is cold, and hikers without proper footwear and traction regularly slip. The National Park Service stops short of requiring gear, but every experienced Narrows hiker treats canyoneering boots and a walking stick as non-negotiable. Neoprene socks become genuinely important in spring (April–May) when snowmelt keeps water temperatures at or below 50°F.
Flash Flood Risk: The Monitoring Process First-Timers Skip
Flash flooding in the Narrows is a genuine, recurring hazard. The canyon can flood from storms occurring many miles away — you can be standing in a dry, sunny canyon when a wall of water arrives from a storm you never saw. Flash floods in the Narrows have killed hikers.
The monitoring process is straightforward:
- Check the NPS Zion website the night before your hike. The park posts daily flash flood risk ratings — Low, Moderate, High, or Extreme. Do not enter the Narrows on High or Extreme days.
- Check with the Wilderness Desk at the Zion Visitor Center on the morning of your hike. Rangers update conditions in real time and will advise or restrict access based on current upstream weather.
- Establish your turnaround plan before you enter the water. Agree with your group on a turnaround time (not just a location). Conditions can change while you’re in the canyon.
- Know the signs of an incoming flood: sudden water color change, rising debris, roaring sound upstream. If you observe any of these, exit the canyon immediately by climbing canyon walls — do not attempt to outrun a flash flood in the river.
Narrows Safety & Equipment Checklist — Verify Before You Enter
Footwear
- [ ] Canyoneering boots (or water shoes with ankle support) confirmed rented or packed
- [ ] Boots are properly fitted and broken in or tested for comfort
- [ ] Neoprene socks included (essential in water below 60°F)
Flood Awareness
- [ ] Flash flood risk rating checked on nps.gov or at Visitor Center (confirm Low or Moderate)
- [ ] Wilderness Desk consulted morning of hike for real-time upstream weather
- [ ] Turnaround time established with your group before entering water
- [ ] Emergency exit points identified: canyon walls are your escape route, not the riverbank
Water Planning
- [ ] Minimum 4 liters of drinking water per person carried in pack
- [ ] Water source plan confirmed: no river water without treatment (see cyanobacteria section)
- [ ] Dry bag verified waterproof and protecting phone/wallet/keys
Safety Equipment
- [ ] Trekking/hiking stick confirmed (one per person strongly recommended)
- [ ] Emergency communication plan established — cell service is nonexistent in the canyon
- [ ] Group members briefed on turnaround signals and meeting point if separated
Cyanobacteria Water Realities: What Filters Don’t Tell You
The cyanobacteria zion water safety issue is the most important water-related information gap in first-time Narrows guides, and it has direct health implications. This is not a comfort issue or a taste issue — it is a toxicology issue.
The Virgin River hosts naturally occurring benthic cyanobacteria — blue-green algae mats that grow on the river bottom rocks throughout Zion Canyon. During certain conditions (particularly warm, low-flow periods in late summer), these mats produce cyanotoxins — chemical toxins that are released into the water when the mats are disturbed.
Here is what virtually no travel guide explains: standard backpacking water filters — including Sawyer Squeeze, Katadyn BeFree, and similar hollow-fiber filtration systems — remove biological contaminants (bacteria, protozoa) but do not reliably remove dissolved cyanotoxins. Cyanotoxins are chemical compounds, not organisms, and they pass through mechanical filters. The only water treatment that reliably neutralizes cyanotoxins is activated carbon filtration combined with reverse osmosis — technology that is not available in field-portable form.
The practical implication: You should not drink Virgin River water during your Narrows hike, even with a quality backpacking filter. This is not the same guidance as most trail water — most backcountry water can be safely filtered. Narrows water requires a different safety approach.
Safe alternatives:
- Carry all drinking water from Springdale or the Visitor Center before entering the canyon. Four liters per person is the minimum for a 3–5 mile round-trip hike in warm conditions.
- Big Springs, approximately 1.5 miles upstream from the Riverside Walk endpoint, is considered potable water — it emerges from the canyon wall rather than from the river itself and is typically safe to filter. However, conditions vary, and the NPS recommends confirming potability at the Wilderness Desk before relying on it.
- Do not swallow river water. Keep water contact away from your face during wading.
The NPS posts seasonal cyanobacteria advisories when blooms are particularly severe. Check the Zion alerts page at nps.gov/zion before your visit, particularly for July through September visits.
| Metric | Value |
|---|---|
| Annual Visitors | Approximately 5 million+ visitors annually |
| Shuttle Season | March 7–November 28, 2026 |
| Holiday Shuttle Service | December 26–January 2 |
| Angels Landing Lottery Fee | $6 per application |
| Permit Issuance Fee | $3 if selected |
| Maximum Permit Group Size | 6 hikers |
| Narrows Water Advisory | Seasonal cyanobacteria advisories possible |
| Earliest Recommended Arrival | Before 7:30 AM |
| Visitor Center Parking Fill Time | Typically 7:30–8:00 AM on peak days |
Additional Frequently Asked Questions
Is Zion worth visiting with kids?
Yes. Zion is one of the most family-friendly national parks in the United States. Families can enjoy the Pa’rus Trail, Riverside Walk, Lower Emerald Pool area, and scenic shuttle rides without attempting strenuous hikes. The shuttle system also reduces the amount of driving required inside the canyon. Parents should focus on early starts, adequate hydration, and avoiding the hottest afternoon hours during summer.
What is the hardest hike in Zion National Park?
The hardest commonly attempted hike is generally considered the full West Rim Trail from Lava Point or the top-down Narrows route. For day hikers, Angels Landing remains the most psychologically demanding because of exposure and chain-assisted sections. Physical difficulty and exposure are different challenges, so visitors should evaluate both before choosing a trail.
Can beginners do Angels Landing?
Beginners can reach Scout Lookout with reasonable fitness, but the final chain section of Angels Landing is not ideal for everyone. The route includes steep drop-offs, narrow ridgelines, and significant exposure. Visitors uncomfortable with heights often find Scout Lookout to be a satisfying turnaround point that still delivers exceptional canyon views.
Where should I stay for one day in Zion?
For a single-day visit, Springdale provides the most efficient base. Staying within walking distance of a town shuttle stop removes parking stress and allows earlier access to the canyon. Budget travelers may also consider accommodations farther from the park entrance, but additional driving time can significantly affect morning shuttle access.
Do I need hiking poles for the Narrows?
While not legally required, most experienced Narrows hikers consider a trekking stick or hiking pole essential. The Virgin River bottom consists of uneven rocks, shifting gravel, and submerged obstacles that are difficult to see. A sturdy pole improves balance, reduces slips, and helps test water depth before stepping forward.
Frequently Asked Questions
What is the best month to visit Zion National Park?
March through May and September through early November are the best months to visit Zion for most first-time visitors. These shoulder seasons offer a balance of manageable crowds, mild temperatures (60°F–80°F during the day), and reliable trail access. Spring brings wildflowers and flowing water but also higher Narrows flood risk due to snowmelt. Fall delivers the park’s most stable weather and the lowest visitor-to-permit ratio for Angels Landing. Summer (June through August) means heat above 100°F on canyon floors, peak crowds, and the most aggressive permit competition. Winter provides solitude and vehicle access to Zion Canyon when shuttles aren’t running, but higher trails may require traction devices. If you must visit in summer, prioritize the earliest possible arrival times.
How many days should first-time visitors spend in Zion?
Two to three days gives first-time visitors enough time to hike the major trails without rushing. One day is a viable minimum — you can complete Angels Landing or the Narrows plus Riverside Walk — but you’ll need to make a choice and commit to one trail priority. The ideal first-time itinerary uses Day 1 for Angels Landing (morning, early permit window), Day 2 for the Narrows (full day, start by 7:30 AM), and Day 3 for shorter hikes like Emerald Pools, Canyon Overlook, or Pa’rus Trail. Families with young children should plan for more time at each location — the canyon is logistically demanding with small kids, and rushing creates frustration. A three-day stay also allows a backup day if a flash flood closes the Narrows on your planned hike day.
What should first-time visitors pack for Zion?
Every first-time visitor needs sun protection, water capacity, and footwear appropriate for their planned trails. For sun protection, bring SPF 50+ sunscreen, a brimmed hat, and UV-blocking sunglasses — canyon walls intensify reflected UV exposure. For water, carry a minimum of 2 liters for canyon hikes and 4 liters for the Narrows. The Zion packing list for first-time visitors should include: hiking boots or trail runners with ankle support (especially for Angels Landing, where chain sections require solid footing), a light rain layer for afternoon thunderstorms in summer, and a daypack large enough to hold water, snacks, and a first-aid kit. For Narrows specifically, add neoprene socks, a trekking stick, and a dry bag. Leave large rolling luggage in your car — trails do not accommodate it.
Can you drive through Zion Canyon?
During shuttle season (March 7 through November 28, 2026), private vehicles cannot drive Zion Canyon Scenic Drive beyond Canyon Junction. The road is closed to private traffic during this period, and the Zion Canyon Shuttle is the only access to canyon trailheads. Outside shuttle season — from late November through early March, except for the December 26–January 2 holiday shuttle period — you can drive your own vehicle through Zion Canyon and stop at pullouts along the road. The Kolob Terrace Road and Zion–Mount Carmel Highway (which includes the scenic tunnel) are open to private vehicles year-round, subject to vehicle size restrictions in the tunnel. If driving through the tunnel, vehicles over 7’10” wide or 11’4″ tall require an escort and incur a $15 escort fee.
What is the Zion Canyon shuttle schedule for 2026?
The Zion Canyon Shuttle operates from March 7 through November 28, 2026, with holiday service from December 26 through January 2. During peak season (spring and fall), service begins around 6:00 AM and runs until approximately 11:00 PM, with frequency increasing to every 6–7 minutes during midday. During slower periods (early March, late November), frequency drops to every 10–15 minutes. The shuttle runs nine stops through Zion Canyon, from the Visitor Center (Stop 1) to Temple of Sinawava and the Narrows trailhead (Stop 9). There is no reservation system for the shuttle — riders board at any stop on a first-come, first-served basis. The Springdale Town Shuttle operates on a separate schedule that roughly mirrors the canyon shuttle’s operating hours. Confirm exact 2026 schedules at nps.gov/zion before your visit, as the NPS adjusts service based on seasonal demand.
Your Zion Trip Starts Before You Arrive
The visitors who have the worst time at Zion National Park are almost never the least fit ones. They’re the ones who planned the hike but not the transit, secured the dates but not the permits, and packed the trail mix but not the right footwear for the Narrows.
These Zion National Park tips for first-time visitors exist because the park rewards preparation, not improvisation. Set up your Recreation.gov account before you leave home. Know which parking lot you’re targeting and what time it fills. Understand the two-shuttle system and the physical path between them. Decide on your Angels Landing strategy — seasonal lottery, day-before, or Scout Lookout — before midnight on your first night. And carry your water into the Narrows; don’t rely on filtering the river.
If you’re ready to plan the rest of your trip, start with lodging near Zion — the [best places to stay near Zion] range from Springdale boutique hotels to BLM dispersed camping options just outside the park boundary. For hikers extending into the region, the Kolob Canyons section of Zion National Park offers a completely different canyon experience with a fraction of the crowds.